
Best Deals on Solar Path Lights (No-BS Guide)
You’re hunting for the best deals on solar path lights, but you don’t want that “$19 for 12 lights” nonsense that looks great for two weeks and then dies quietly like a sad porch plant.
The problem is most “deals” are just cheap parts packaged as optimism: tiny panels, bargain-bin batteries, and housings that leak the first time your sprinklers look at them.
I’ve installed, tested, repaired, and replaced more solar path lights than I’d like to admit. Fast forward to today: I care less about the sticker price and more about cost per season. That’s how you actually win.
Table of Contents
- Where the real deals are (and where “deals” go to die)
- Specs that actually matter (ignore the shiny box)
- Deal-killers & marketing lies I’m done pretending are okay
- My no-BS shortlist (by use-case, not hype)
- Install & maintenance: protect your deal like an adult
- Frequently Asked Questions
- Bottom line
Where the real deals are (and where “deals” go to die)
Quick answer: The best deals on solar path lights come from buying the right tier (mid-grade with decent batteries), shopping seasonal timing (spring/early summer promos, end-of-season clearance), and choosing sets with replaceable cells. Avoid ultra-cheap bulk packs unless you enjoy re-buying the same “deal” every year.
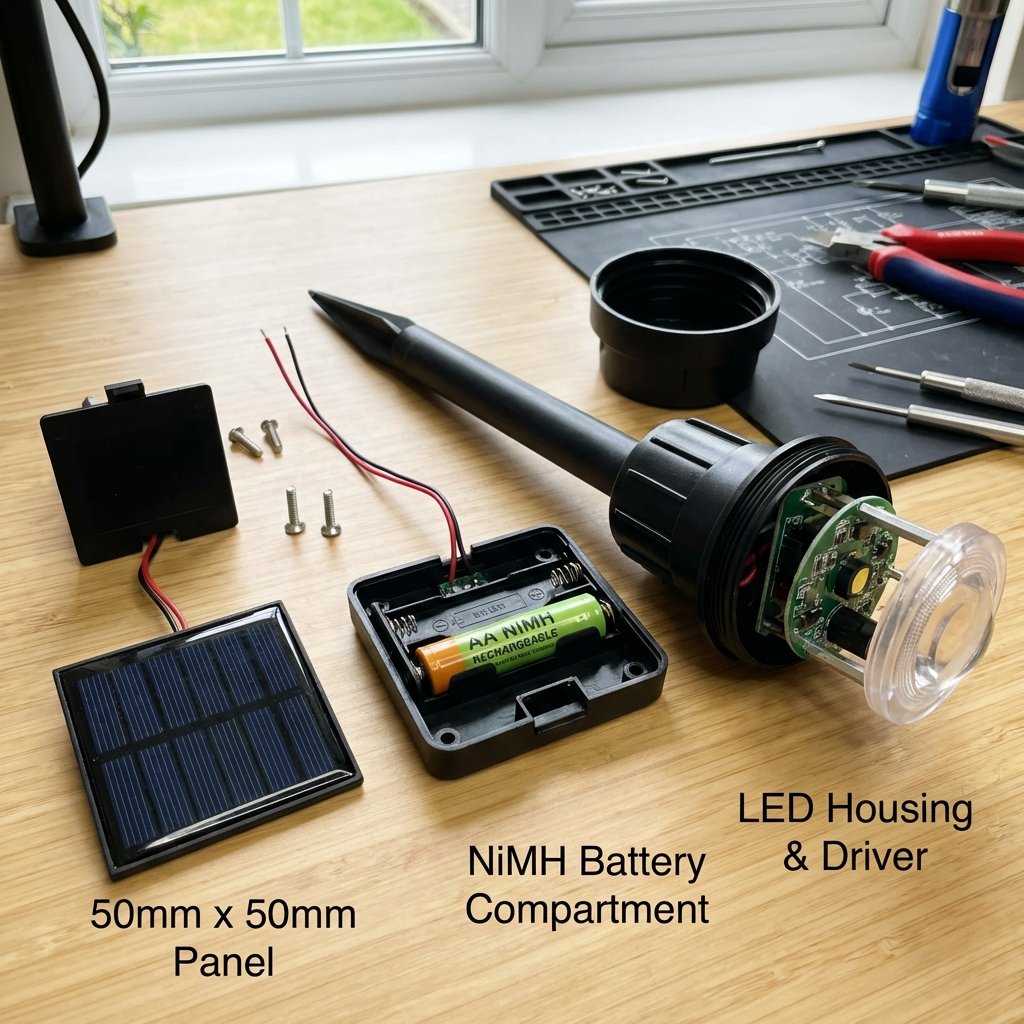
Here’s the truth: solar path lights are a tiny solar power system. Panel + battery + LED + controller + housing. If one part is garbage, the whole thing is garbage. And when you see a price that looks “too good,” the savings usually came from:
- Battery capacity (the #1 silent killer)
- Panel size/quality (small panel = slow charge = dim light)
- Sealing (water intrusion = corrosion = dead lights)
- Thin stakes (snap on install; congrats on your new yard darts)
So where do real deals live?
- Seasonal promos when brands push “new colors” or “new lens styles” that change nothing electrical.
- Warehouse-style multipacks from reputable brands (not random keyboard-smash companies).
- Refinements, not reinventions: the same model, updated battery door or better lens, often discounts the older packaging.
If you’re still planning layout and spacing, skim this practical planning walkthrough for solar lighting installations first. Buying “a deal” before you know your spacing is how people end up with runway lights on one side and darkness on the other.
Also: solar performance is basically sunlight math. Shorter winter days and cloudy stretches reduce charging. The U.S. Department of Energy gives a solid primer on how solar energy depends on sunlight availability and system design (DOE Solar Energy Basics). Different scale, same physics.
Specs that actually matter (ignore the shiny box)
Most listings throw around “super bright” like it’s a spec. It’s not. If you want actual value, care about these:
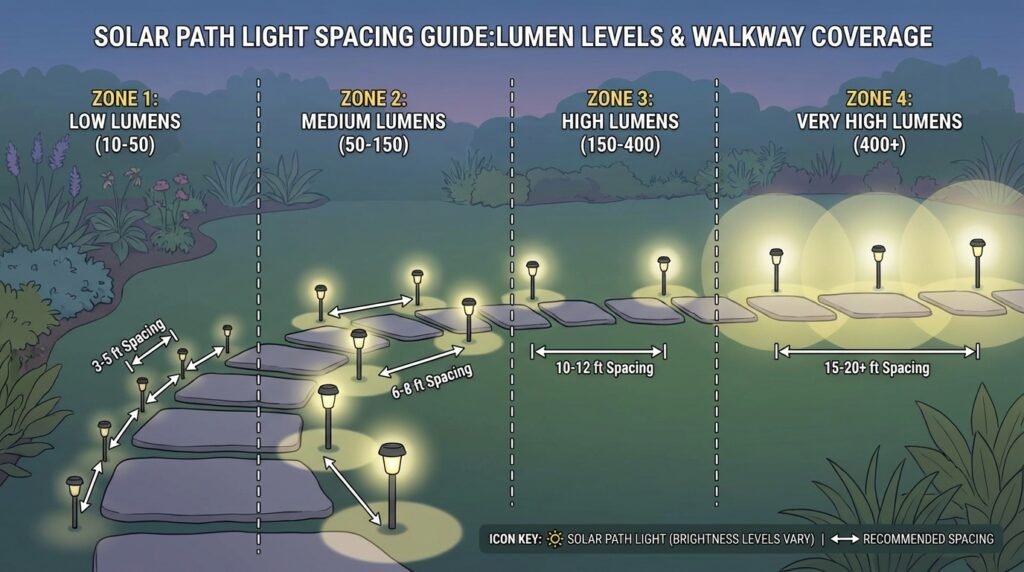
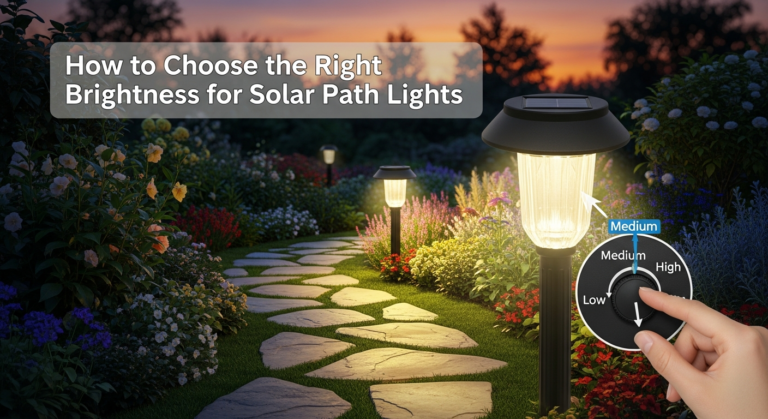
1) Lumens (but with common sense)
5–20 lumens: subtle edge marking, “don’t trip” lighting.
20–60 lumens: the sweet spot for most paths and garden borders.
60+ lumens: often too harsh unless you’re spacing wide, aiming carefully, or using shielding optics.
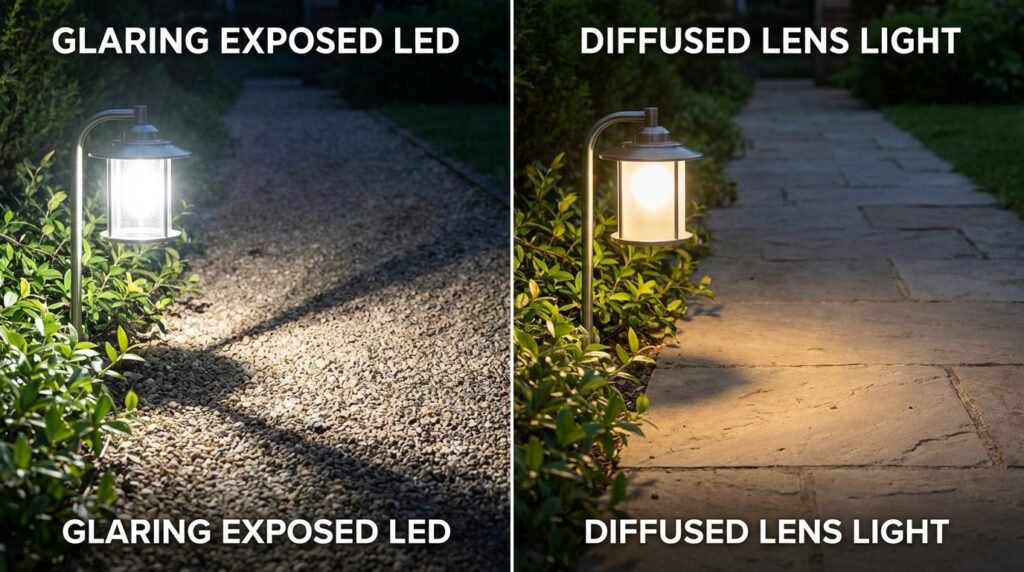
Bonus reality check: lumens without beam pattern is half a spec. A poorly designed lens can blast glare into your eyes and still fail to light the path evenly. If the product photos show the LED “point” visible with no diffuser, assume glare.
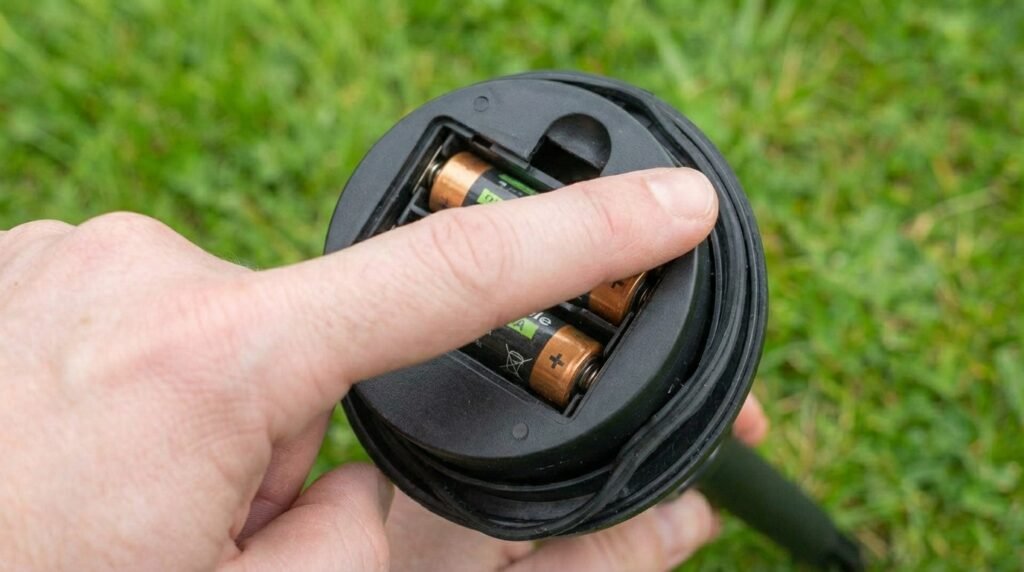
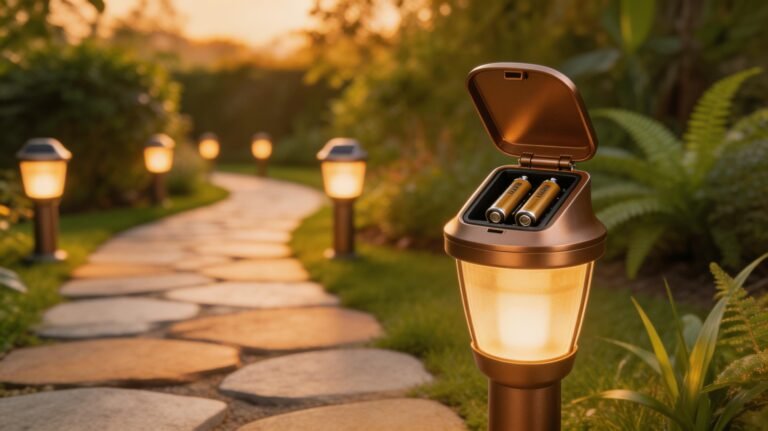
2) Battery type and access
Battery chemistry matters, but access matters more. If replacing a battery requires a screwdriver that strips the first time you use it, that light is basically disposable.
Wikipedia’s overview of common rechargeable batteries is a decent reference for the tradeoffs (NiMH vs lithium variants) if you want the nerdy details (Rechargeable battery basics).
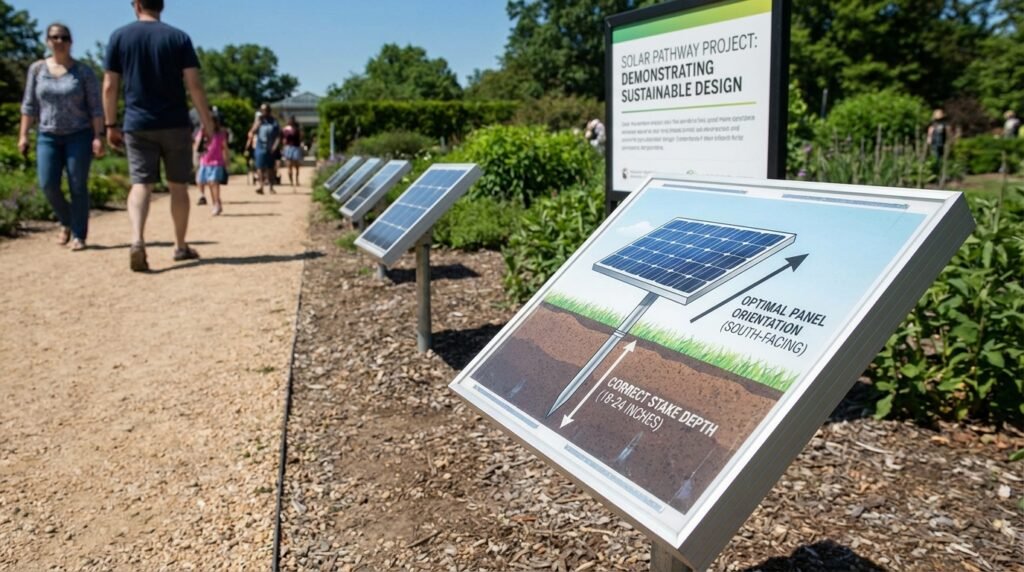
3) Panel size and placement
Small panel + big lumen claims = marketing. Either the runtime will be short, or the brightness will fall off a cliff after 60–90 minutes.
Also, panel orientation isn’t just for rooftop PV. Even for little garden lights, shaded panels charge poorly. NREL’s PV research materials are a good reminder that efficiency and real-world conditions matter (NREL Photovoltaics Research).
4) Weather sealing and materials
Stainless steel isn’t magic, but it usually beats painted mystery metal. Plastic can be fine if it’s thick and UV-resistant. The cheap stuff turns chalky, cracks, and then invites water to the party.
My take: if the listing avoids any mention of sealing or weather resistance, assume it’s “weather resistant” in the same way a paper towel is “water resistant.”
Deal-killers & marketing lies I’m done pretending are okay
Some things are just bad engineering wrapped in cheerful copywriting. If you want the best deals on solar path lights, learn these red flags and you’ll dodge 80% of the junk.
- “All-night brightness” with no mode details. If it doesn’t mention brightness modes, motion sensing, or actual runtime conditions, it’s wishful thinking.
- “IP65” slapped everywhere with zero credibility. Sure, maybe. Or maybe the seller found “IP” on a keyboard and went wild.
- Non-replaceable batteries (or “sealed” units). Translation: planned replacement purchase.
- Too-cheap stakes. If the stake looks like brittle plastic in the photos, it will snap in compacted soil. Then you’ll invent new words.
- Blue-white LEDs for pathways. They’re harsh, they exaggerate glare, and they make your yard look like a parking lot. Warm white (around 2700K–3000K) is usually the move.
If you want a fast way to avoid aesthetic disasters, read this guide on choosing solar path lights that actually fit your home’s style. A “deal” that clashes with your exterior is just an eyesore you paid for.
Also worth knowing: LEDs are efficient, but efficiency isn’t a free pass for bad design. The physics of light output vs power consumption is real (LED basics), and tiny solar lights have tiny energy budgets. When sellers promise stadium lighting from a coin-sized panel, that’s not optimism—it’s nonsense.
My no-BS shortlist (by use-case, not hype)
I’m not doing the fake “Top 27 Picks” thing. You want categories that map to real yards and real budgets.
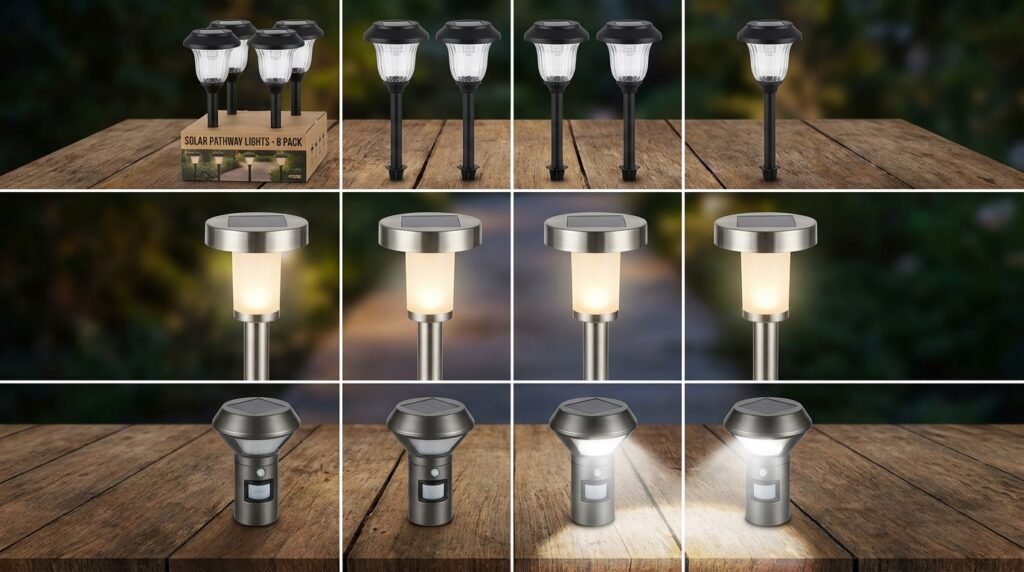
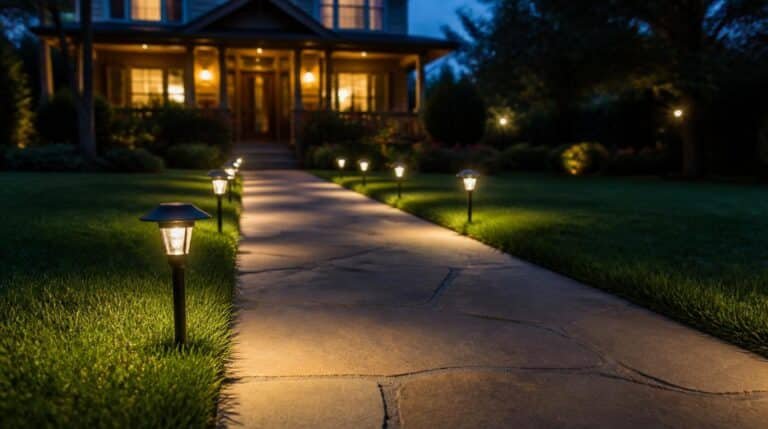
Use-case A: “I just need the path visible” (best value multipacks)
What to buy: 8–12 packs with moderate lumens, warm white, and replaceable batteries. These are the best deals when you have a longer walkway and want consistent spacing without spending like you’re lighting a resort.
What to avoid: 16–20 packs under a suspiciously low price point. That’s almost always tiny batteries plus sadness.
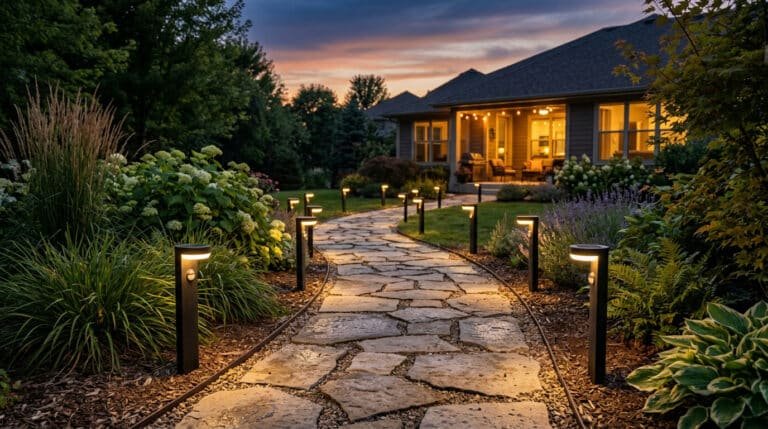
Use-case B: “I want it to look intentionally designed” (better optics, better materials)
What to buy: fewer lights, better build. Look for metal housings, diffused lenses, and designs that hide the LED point. This is where “deal” means buying fewer units that last longer and look better.
Use-case C: “I’m tired of dim lights by midnight” (dual-mode or motion-assist)
Best bang-for-buck feature: lights that run dim most of the night, then bump brighter when motion is detected. That’s how you stretch battery runtime without turning your yard into a cave.
Use-case D: “My yard is shady” (the honest answer)
Solar lights in deep shade usually suck. Not because solar “doesn’t work,” but because you’re starving the panel. Your options:
- Move the lights where they can actually charge, or trim plants. Yes, I know. Adulting.
- Use fewer, higher-quality lights and accept lower brightness.
- Consider a different lighting approach for that specific area (low-voltage wired) if safety matters.
If you want to get the layout right before you buy anything, loop back to this installation planning guide. The best “deal” is not buying twice.
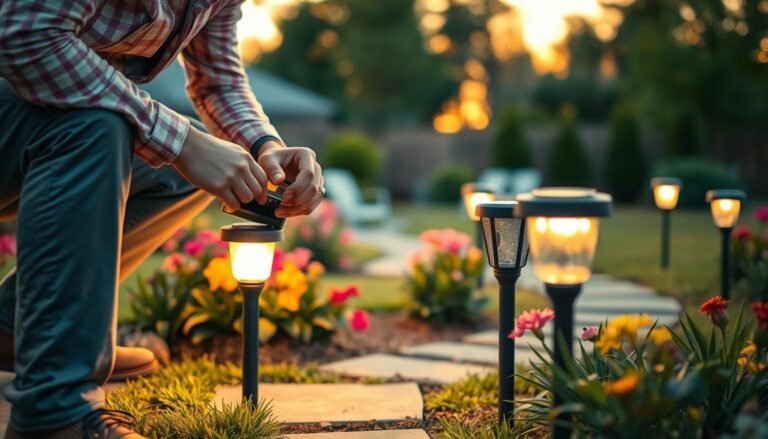
Install & maintenance: protect your deal like an adult
This is where most people sabotage themselves. They buy decent lights, then install them like they’re planting flags on the moon.
- Charge first, judge later. Give them a full sunny day before you decide they’re “dim.” Many ship partially charged.
- Keep panels clean. Dust and pollen cut charging. Wipe the panel every few weeks during high pollen seasons.
- Don’t bury the housing. Only the stake goes in the ground. If you bury seams, you invite water.
- Space smarter. More isn’t always better. Too many lights close together looks like an airport taxiway.
- Replace batteries proactively. If a set fades after a year, it’s often batteries, not LEDs. Replace the cells before you throw the whole set away.
If you want the full “what not to do” list (with the stuff that breaks lights fast), read these rookie installation and maintenance mistakes to avoid. It’ll save you money and keep you from doing the midnight “why is this one dead?” walk.
Insider note: water intrusion is the silent budget killer. Once corrosion starts, the charging circuit gets weird, batteries get abused, and brightness drops even if everything “looks fine.” If you see fogging inside the lens, that’s not “normal.” That’s a countdown timer.
Frequently Asked Questions
How many lumens do I actually need for solar path lights?
For basic wayfinding, 5–20 lumens per light is usually fine. If you want the path to look intentionally lit (not just “don’t trip”), aim for 20–60 lumens per fixture and space them farther apart. Above that, you’re usually buying glare, not elegance.
Do “all-night” solar path lights really last all night?
Sometimes. “All-night” is usually tested with a fully charged battery, a clean panel, and long summer daylight. In winter or shade, the same light may run half as long. Motion-sensor or dual-mode lights (dim-to-bright) are the most reliable way to get long runtime.
Which batteries are better: NiMH or lithium?
Lithium (often Li-ion or LiFePO4 depending on the design) generally offers higher energy density and good cold performance when the electronics are designed for it. NiMH is common, affordable, and easy to replace. Bottom line: a quality battery compartment you can access matters more than the chemistry label.
Why do cheap solar path lights get dim after a few months?
Usually a combo of tiny batteries, poor charging control, water intrusion, and cloudy panels. The LED isn’t the problem; the power system is. If the seal is flimsy or the battery is a no-name cell, expect the “great deal” to turn into a landfill donation.
Are solar path lights safe to leave outside year-round?
If they’re built for it. Look for solid weather sealing, corrosion-resistant stakes, and a battery compartment that doesn’t trap water. In harsh winters, pop the batteries for storage if the lights aren’t rated for cold—otherwise you’ll be shopping again sooner than you’d like.
Bottom line
Here’s the truth: the best deals on solar path lights aren’t the cheapest sets—they’re the sets that stay bright, survive weather, and let you replace the batteries instead of replacing your pride.
Insider takeaway: prioritize replaceable batteries, decent panel area, and sealed construction. Then buy during seasonal promos and stop falling for lumen fairy tales.
Now go light your path like you meant to do it on purpose. If you end up with a 20-pack of “ultra bright” blue LEDs that look like an alien landing strip, don’t say I didn’t warn you.
As an Amazon Associate, I earn from qualifying purchases.

One Comment
Comments are closed.