How to Choose Solar Path Lights That Don’t Disappoint at Night
How to choose solar path lights that don’t disappoint at night starts with accepting one uncomfortable fact: most “bright” solar lights are bright in the listing… and mediocre in your yard.
The problem is the marketing is optimized for clicks, not photons. So you get lights that look fine at dusk, then fade into sadness by 9:30 PM.
Here’s the truth: night performance isn’t one spec. It’s a chain—panel size, battery chemistry, driver behavior, optics, and placement—and the chain breaks at the cheapest link.
Table of Contents
- Why “good reviews” still disappoint at night
- Brightness: lumens vs. hype vs. reality
- Color temperature and the glare problem
- Runtime: the spec everyone lies about
- Battery + panel: what actually matters
- Optics and spacing: the secret sauce
- Shade, weather, and seasonality
- Quality signals and red flags
- My no-BS shopping playbook
- Frequently Asked Questions
- Final insider takeaway
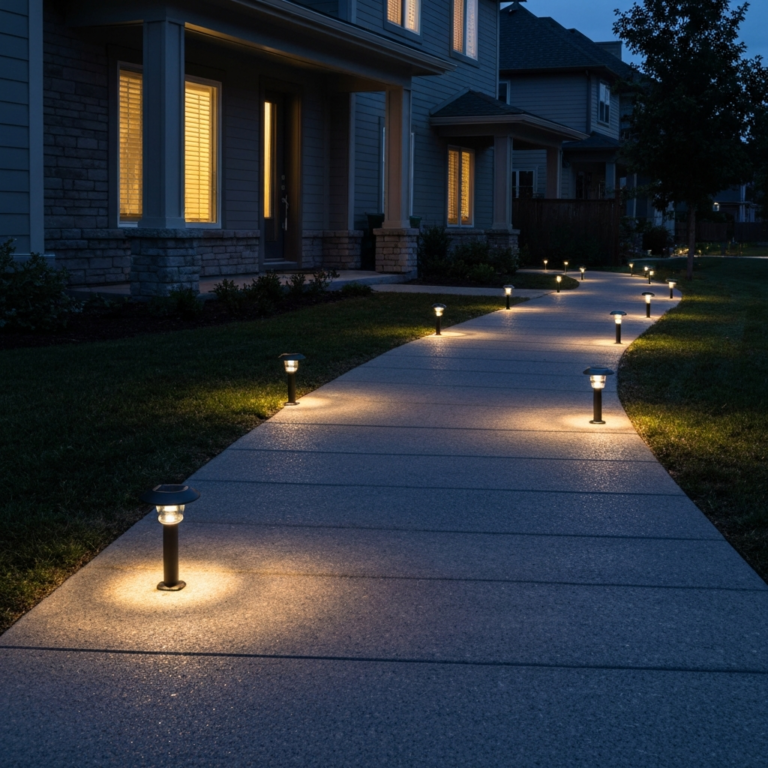
Why “good reviews” still disappoint at night
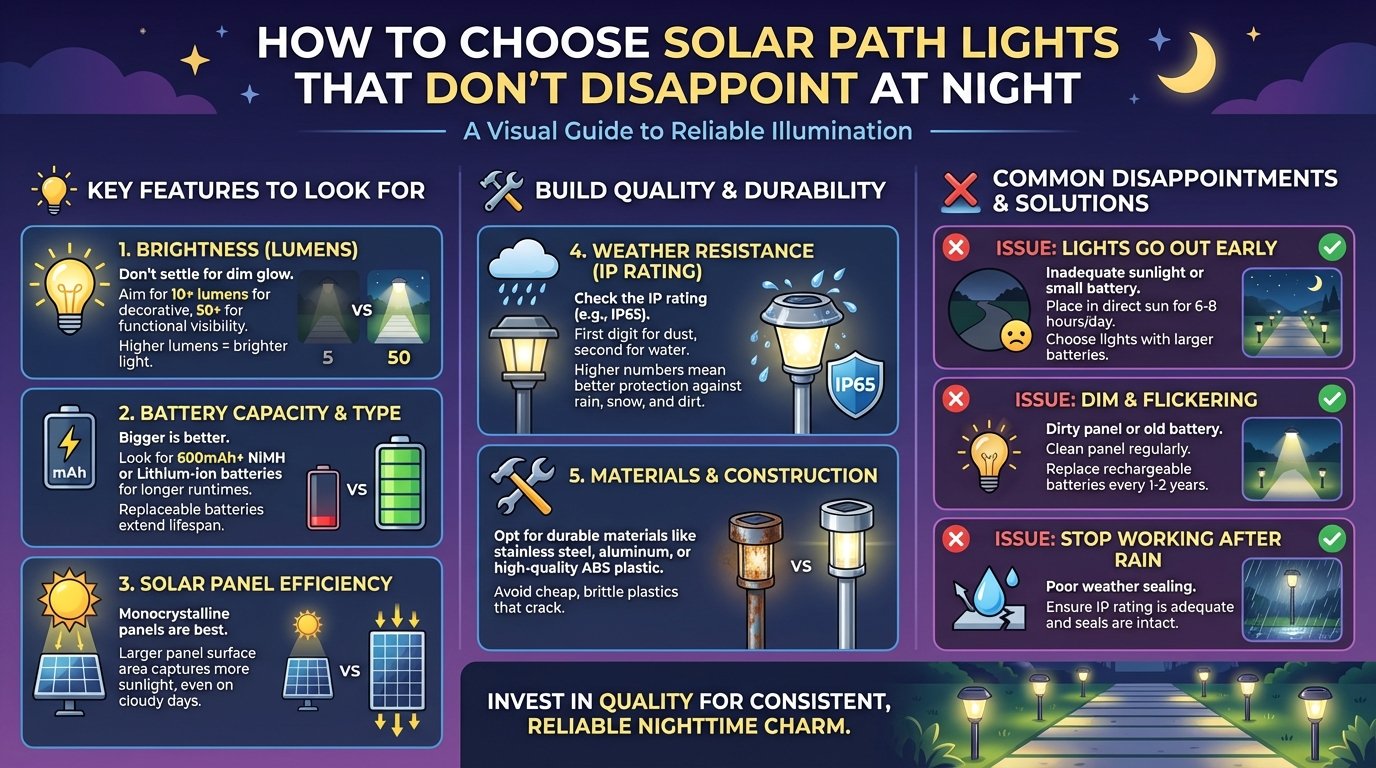
Snippet answer: To avoid disappointment at night, choose solar path lights with honest lumens, warm-white color, controlled optics, replaceable batteries, and a panel/battery big enough to sustain brightness for 6–10 hours. Then place them to avoid glare and give the panels full sun. Most failures come from tiny batteries and bad placement.
Fast forward to the typical buyer journey: you see “100,000 lumens” (lol), 4.7 stars, and a bunch of night photos that look like a movie set.
Then you install them and realize those photos were taken at dusk, on a fully charged battery, with a camera that’s basically cheating.
Night disappointment is almost always one of these:
- Overstated brightness (or no lumens listed at all).
- Battery too small to hold brightness beyond the “first hour flex.”
- Panel too small to recharge fully in real-world conditions.
- Optics that spray light everywhere (including into your eyes).
- Bad placement (shade, glare lines, uneven spacing).
If you want a baseline on planning and layout, skim this installation planning guide first. It’s the part everyone skips, then wonders why “solar doesn’t work.”
Brightness: lumens vs. hype vs. reality
Let’s clean up the mess: lumens are the measure of total light output. If a brand won’t list lumens, they’re telling you who they are. Believe them.
For definitions, yes, boring but necessary: see the lumen overview on Wikipedia.
What lumen range actually works for walkways?
- 5–15 lumens: subtle “breadcrumb” edge lighting. Looks classy when evenly spaced.
- 15–30 lumens: the sweet spot for most residential paths. Visible, not obnoxious.
- 30–80 lumens: for wider paths, darker yards, or when you want more presence (but optics matter).
- 80+ lumens: usually overkill for path lights unless you have shielding and a reason.
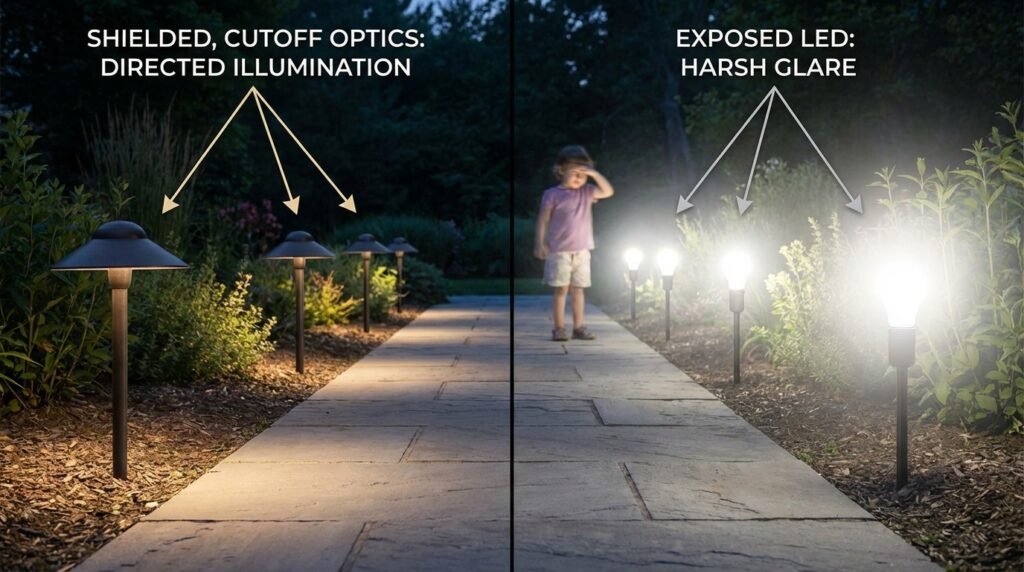
Here’s the punchline: brightness without control equals glare. If the light source is exposed and you can see the LED directly, your eyes will hate you. Your neighbors too.
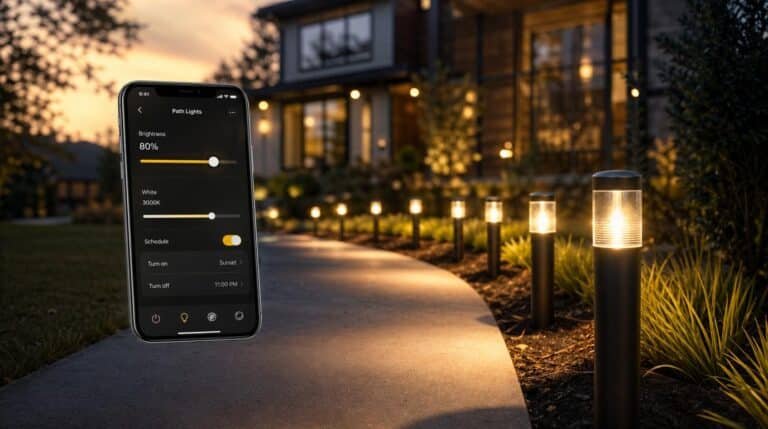
Want to go deeper on what features actually matter in modern units (motion sensors, smart dimming, better optics)? Hit these solar path light tech upgrades—it’s the stuff that separates “cheap stakes” from “keeps working.”
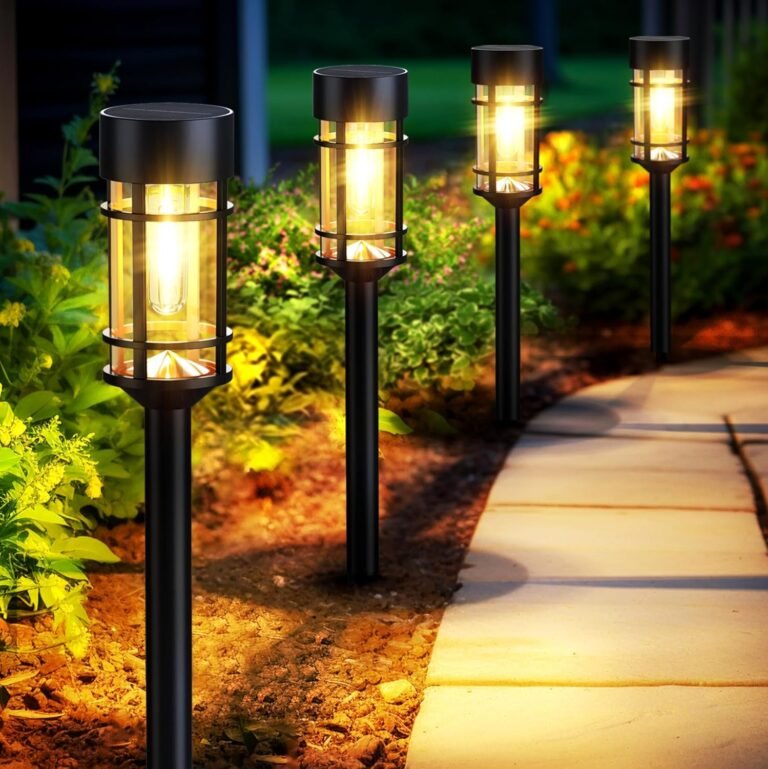
Color temperature and the glare problem
Color temperature is where a lot of “looks cheap” comes from. Cool white can look harsh and plasticky outdoors, especially on plants, stone, and warm-toned exteriors.
If you’re aiming for “expensive landscape lighting vibes,” stay around 2700K–3000K (warm white). Neutral white (4000K) can work for modern homes, but it’s easier to make it look like a parking lot.
Glare is the silent killer of “nice” lighting
Glare isn’t just annoying—it makes the path harder to see because your eyes adapt to the brightest point, not the walkway.
Insider rule: if you can see the LED chip from standing height, it’s a glare candidate.
If you want a clean, low-glare setup, follow a real placement logic, not “stick them wherever.” Use these placement rules that prevent glare and your walkway will instantly look more intentional.
Runtime: the spec everyone lies about
Most listings say “8–12 hours.” Cool story. Eight hours of what brightness? A candle? A flashlight? A sad glow that technically counts as “on”?
The dirty secret is driver behavior. Many solar lights run a “boost” early, then drop to a low-power mode to survive the night.
How to read runtime like a skeptic
- Look for regulated output language: “constant brightness,” “regulated,” “stable output.”
- Watch for weasel words: “up to,” “depending on conditions,” “varies.” (Yes, it varies. That’s not a spec.)
- Hunt for battery capacity: if they list mAh and voltage, you can sanity-check claims.
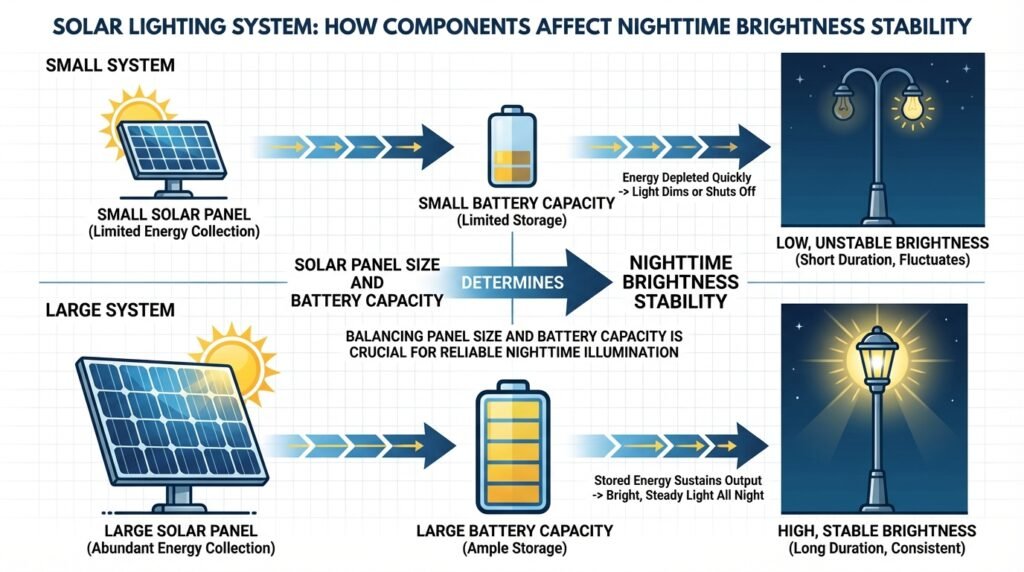
Quick sanity check: higher lumens + long runtime requires more stored energy. Energy comes from the battery. Battery gets charged by the panel. If the panel is a postage stamp, the math doesn’t work. Physics doesn’t care about your Amazon star rating.
For a real-world buyer baseline (and the kinds of product categories that consistently perform), cross-reference your picks with a curated roundup like this buyer’s guide and reviews hub. It helps you avoid the “random brand name soup” problem.
Battery + panel: what actually matters
If you only remember one thing, make it this: a bigger battery with a bigger panel is boring… and it wins.
Lots of cheap solar lights are basically: small panel, tiny battery, optimistic marketing. That’s how you get the “looks great for two weeks” experience.
Battery types you’ll actually see
- NiMH AA/AAA: common, replaceable, generally safe, decent cold performance, lower energy density.
- Li-ion (often 18650 or pouch packs): higher capacity, can sustain brighter LEDs—quality varies wildly.
Replaceable batteries are not a luxury. They’re your escape hatch. When the battery degrades (it will), you either replace it… or replace the whole light.
On the basics of solar cell technology and how sunlight becomes electricity, the U.S. Department of Energy has a solid explainer at energy.gov.
For performance reality checks and PV fundamentals, the National Renewable Energy Laboratory is a legit rabbit hole: nrel.gov.
Panel sizing (in plain English)
Bigger panel = more charging margin. That matters in winter, in partial shade, and on cloudy weeks when your lights would otherwise phone it in.
If the top of the light is mostly decorative plastic and only a small patch is panel, don’t expect miracles.
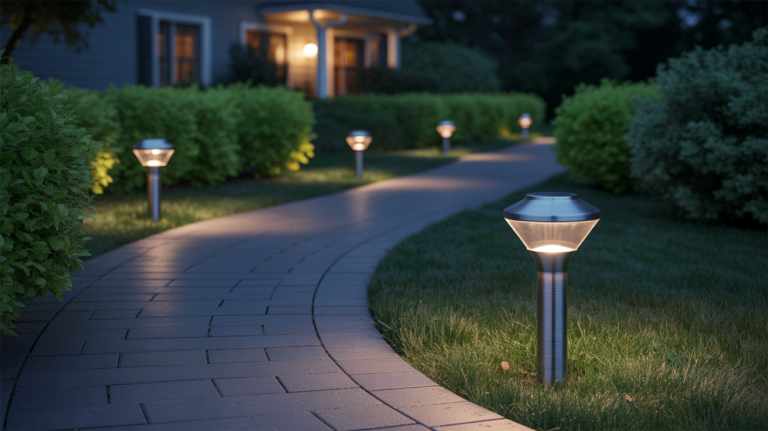
Optics and spacing: the secret sauce
Brightness is only half the story. Distribution is the other half—and it’s where cheap lights fail quietly.
Good path lights put light on the ground where you need it, with controlled spill. Bad ones blast sideways, glare upward, and make everything look uneven.
What “good optics” looks like
- Diffuser that doesn’t waste light: smooth, even output—no hot spots.
- Cutoff/shielding: you don’t see the LED directly from standing height.
- Defined beam: it lights the path edge, not your shins and the neighbor’s window.
Spacing tip that saves you money: don’t buy twice as many lights to compensate for bad optics. Buy fewer lights that throw a usable pattern.
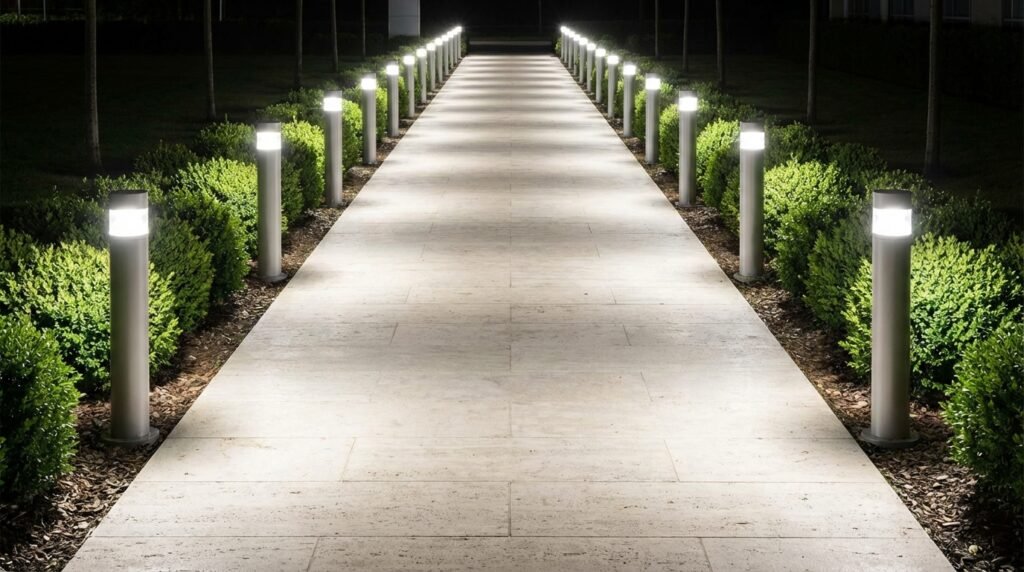
Typical spacing lands around 6–10 feet depending on beam spread and desired “dot vs. wash” look. If you’re using low-lumen, subtle lights, go tighter. If you’ve got controlled 30–50 lumen units, you can spread them out without creating dark gaps.
Shade, weather, and seasonality
People blame “bad solar lights” when the real culprit is their yard. Solar lights are only as good as their solar access.
Tree canopy, north-facing placements, and winter sun angles all cut charging. Add cloudy weeks and you’ve got a system living on a calorie deficit.
Cold weather notes (because winter is rude)
Battery chemistry changes in cold temperatures. Some cells deliver less usable energy, and charging can be less efficient.
For climate and seasonal solar expectations, NOAA’s climate resources are a useful sanity-check starting point: noaa.gov.
Insider workaround: if you have a shaded path but a sunny yard area, consider models with remote panels (not always “path lights,” but it solves the physics problem). Otherwise, accept that shade means lower brightness or shorter runtime.
Quality signals and red flags
Let’s be blunt: there’s a lot of disposable junk in this category. The trick is spotting it before you install 12 tiny disappointments along your walkway.
Green flags
- Lumens listed clearly (not “equivalent wattage” fairy tales).
- Battery type and capacity disclosed (NiMH AA/AAA, or Li-ion with real specs).
- Replaceable batteries (or at least serviceable designs).
- Weather sealing that’s specific (real IP rating details, not “waterproof!!!”).
- Optics described (diffusers, shielding, lens design).
Red flags
- No lumen number anywhere and reviews talk about “pretty” but not “bright.”
- Absurd lumen claims on tiny fixtures (if it sounds like a stadium light, it’s marketing fiction).
- Photos only at dusk (you can tell by the sky brightness and shadows).
- Sealed battery pack with no replacement path (planned obsolescence with extra steps).
Also: don’t ignore the “boring” stuff like stakes and housings. If the stake is flimsy, the light will tilt, your beam pattern will drift, and your path will look sloppy. Design dies by a thousand tiny wobbles.
My no-BS shopping playbook
If you want a fast decision system that doesn’t require you to become a lighting engineer, use this checklist.
- Pick the look first: warm white for classic, neutral for modern. Avoid “blue-white” unless your house is a glass cube.
- Choose a realistic lumen band: 15–30 for most paths; 30–80 if you need more presence and have glare control.
- Demand battery clarity: type + replaceability. If it’s vague, pass.
- Check panel size: bigger top surface devoted to the panel is usually better.
- Confirm glare control: shielding/cutoff or diffuser design that hides the LED point source.
- Plan spacing before you buy quantity: fewer good lights beat more bad ones.
Bottom line: if you buy based on “most bought” and ignore panel/battery/optics, you’re basically gambling. Sometimes you win. Often you install regret.
If you want to compare categories and avoid the worst offenders, use a structured roundup like Solar Path Lights buyer’s guide and reviews as your shortlist layer, then apply the checklist above to filter the “looks good in photos” traps.
Frequently Asked Questions
How many lumens do solar path lights need to look good at night?
For most walkways, 10–30 lumens per light looks clean without glare. If you want more “presence” or you’re lighting wider edges, aim for 30–80 lumens, but only if optics control the beam and the battery/panel can sustain it.
Why do my solar path lights look bright at first, then get dim after an hour?
Usually it’s a tiny battery, an undersized panel, or a driver that front-loads brightness then throttles. Look for bigger batteries, bigger panels, and reviews that mention brightness staying stable past the first hour.
Is cool white brighter than warm white for solar lights?
Cool white can look brighter, but it can also look harsh and create more glare. Warm white (around 2700K–3000K) typically looks more premium on residential paths. Real brightness comes from lumens + optics, not color temperature.
Do replaceable batteries matter, or is that a nice-to-have?
They matter. A lot. Non-replaceable batteries turn the light into a disposable gadget. If the listing doesn’t clearly state replaceable cells, assume you’re buying something that becomes e-waste when the battery degrades.
What’s the #1 placement mistake that ruins solar path lights at night?
Glare and crowding. Putting lights too close together or in positions where you see the LED directly makes the whole path look worse and feel less safe. Use glare-preventing placement rules and space based on beam spread, not guesswork.
Final insider takeaway
Here’s the truth: the “best” solar path light isn’t the one with the loudest listing. It’s the one with enough panel and battery to keep output stable, optics that put light on the ground (not in your face), and a placement plan that respects glare.
Buy fewer, better lights. Space them like you meant it. And if a brand claims stadium-level lumens from a plastic cap the size of a cookie… you already know what to do.
—Your friendly neighborhood lighting cynic
As an Amazon Associate, I earn from qualifying purchases.

One Comment
Comments are closed.