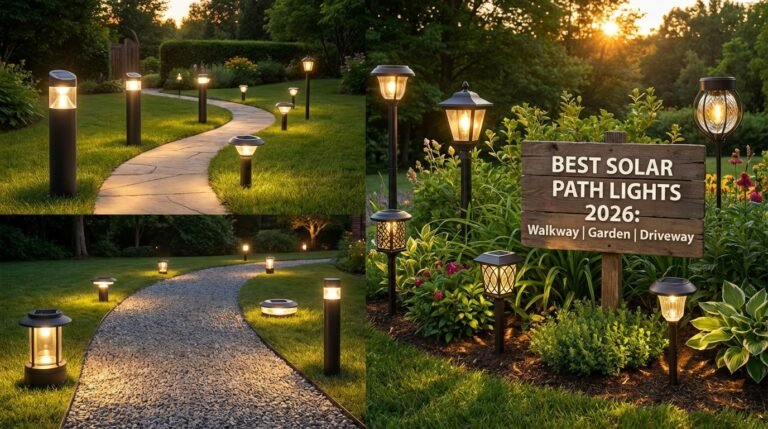
Dusk to Dawn Pathway Lighting Safety: 7 Smart Tips That Actually Prevent Accidents
Here’s a stat that stopped me cold: dusk to dawn pathway lighting safety isn’t just a nice-to-have — the CDC reports that over 37,000 Americans die each year from falls, and outdoor falls in poorly lit areas account for a significant chunk of emergency room visits among adults over 50. You’d think a couple of lights along your walkway would fix that, right? Not exactly. I’ve seen homeowners drop $400 on pathway lights and actually create more dangerous conditions than they started with — blinding glare, confusing shadows, dark dead zones between fixtures.
The real problem isn’t darkness. It’s bad lighting. And if you’re a homeowner or property manager who wants safe walkways that work automatically from sunset to sunrise without babysitting a timer, you need a system, not just a shopping cart full of solar stakes. That’s exactly what I’m breaking down here — seven practical, field-tested tips I’ve refined across dozens of installations.
Table of Contents
- What Dusk to Dawn Pathway Lighting Actually Means
- Tip 1: Map Your Visibility Zones First
- Tip 2: Nail the Spacing (Most People Get This Wrong)
- Tip 3: Choose the Right Brightness — Not the Brightest
- Tip 4: Control Glare Before It Controls You
- Tip 5: Go Fully Automatic with Photocell Sensors
- Tip 6: Integrate Pathway Lighting with Home Security
- Tip 7: Maintain Your Lights Seasonally (5-Minute Routine)
- Myth-Busting: Brighter Pathways Are NOT Safer
- Frequently Asked Questions
- My Top Recommended Gear
What Dusk to Dawn Pathway Lighting Actually Means
Dusk to dawn pathway lighting refers to outdoor walkway fixtures equipped with photocell sensors that activate automatically at sunset and deactivate at sunrise. When properly installed with correct spacing, brightness, and glare control, these lights eliminate trip hazards, deter intruders, and provide consistent nighttime visibility without manual switches or timers.
Let me clear up a misconception I run into constantly. “Dusk to dawn” doesn’t just mean “lights that stay on all night.” It means lights with a photocell sensor — a small light-detecting component that reads ambient brightness and triggers the fixture on or off based on natural light levels. No timers to adjust seasonally. No smart home app to crash at 2 AM. The photocell handles everything, which is exactly why this approach dominates the solar path lights safety and security conversation.
Why does this matter for safety? Because the single biggest failure point in outdoor lighting safety isn’t the bulb — it’s human forgetfulness. People forget to flip the switch. Timers drift out of sync with sunset times. Smart plugs lose Wi-Fi. A photocell-driven dusk to dawn system eliminates the human variable entirely. Your paths stay lit every single night, automatically. That consistency is what prevents falls and deters break-ins.
Tip 1: Map Your Visibility Zones Before You Buy a Single Light
Ever walked through a hotel parking lot at night and noticed how some areas feel perfectly safe while others give you that gut-level unease? That difference comes down to visibility zones — and most homeowners skip this step entirely.
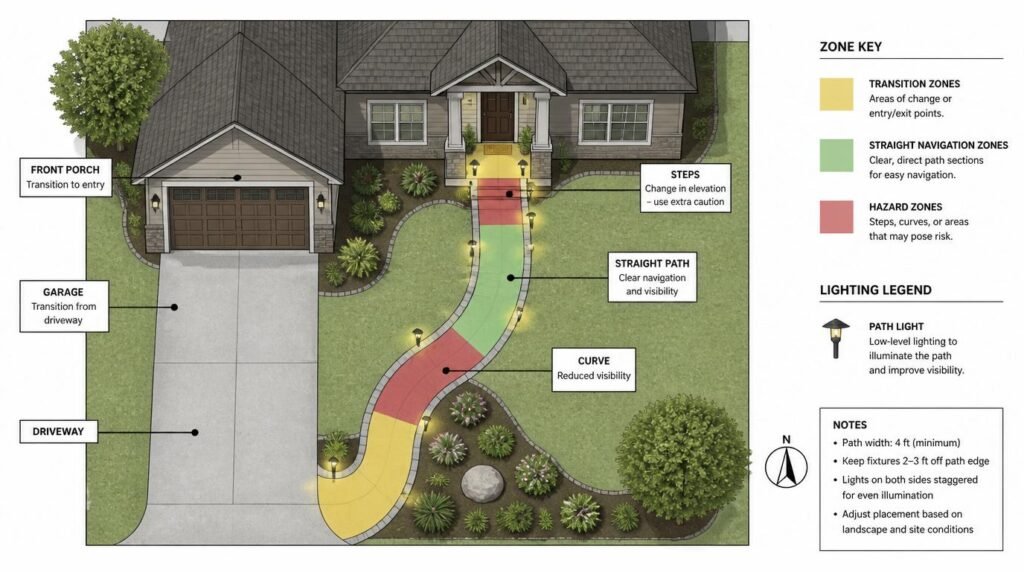
Here’s what I do before every installation: I walk the entire pathway after dark with a flashlight off and identify three zone types.
- Transition zones: Where your eyes shift from bright areas (porch, garage, street) to darker areas. These need the most careful lighting because your pupils are still adjusting.
- Navigation zones: Straight, flat sections of walkway where you simply need enough light to see the path edges and surface texture.
- Hazard zones: Steps, curves, grade changes, uneven pavers, tree root bumps, or anywhere water collects. These demand the brightest, most focused lighting.
I sketch a simple overhead map of the property — nothing fancy, just a napkin drawing — and mark each zone. This becomes my lighting plan. Without it, you’re guessing. And guessing means dark spots between your front door and the sidewalk where your elderly mother-in-law catches her toe on a raised paver. Ask me how I know. 😅
Tip 2: Nail the Spacing — Most People Get This Wrong
How far apart should you place pathway lights for safe walking?
I’ve lost count of how many properties I’ve visited where the homeowner bought a 10-pack of solar stake lights and just eyeballed the spacing at “every 10 feet or so.” The result? Alternating pools of light and darkness that actually make your depth perception worse than a completely unlit path.
The rule I follow — and the one recommended by the U.S. Department of Energy’s outdoor lighting guidelines — is straightforward:
- Straight, flat sections: Space fixtures 6 to 8 feet apart
- Curves and bends: Tighten to 4 to 5 feet apart
- Steps and elevation changes: Place a light within 2 feet of every transition point
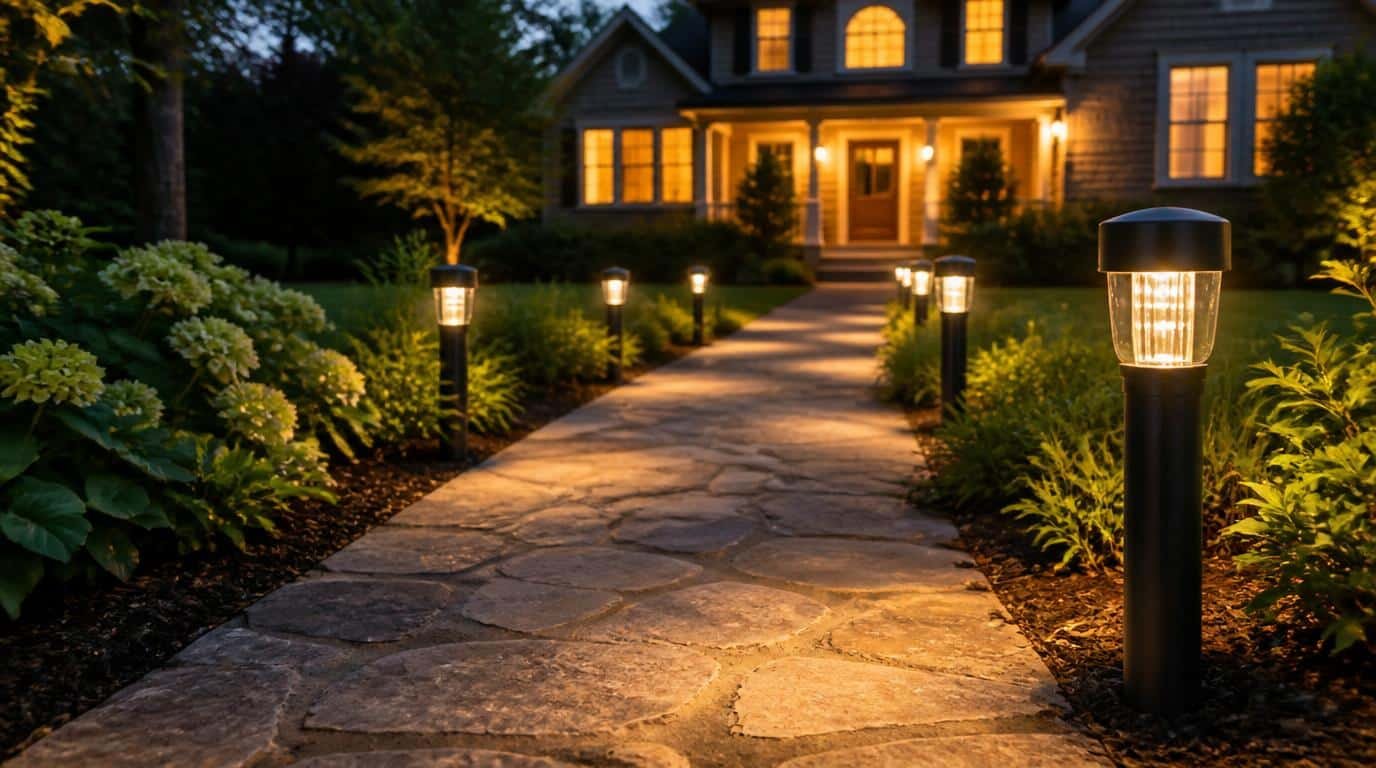
The goal isn’t just “light everywhere.” It’s overlapping light pools — each fixture’s throw should meet or slightly overlap with the next fixture’s throw so there’s zero gap of darkness between them. When I install lights along a walkway, I test this by standing at one fixture and confirming I can clearly see the ground surface all the way to the next fixture. If I see a shadow gap, I add a light or close the spacing.
This is where proper placement rules that prevent glare become your best friend — because tight spacing done wrong just creates a glare tunnel.
Tip 3: Choose the Right Brightness — Not the Brightest
How many lumens do pathway lights actually need?
Here’s the counterintuitive truth I promised you earlier: the brightest pathway lights on Amazon are often the worst choice for safety. I know that sounds backward. Stick with me for a minute.
When you blast a narrow walkway with 500+ lumen fixtures, two things happen. First, your eyes adapt to the bright pool of light, which makes the areas between lights appear pitch black even if they’re not. Second, the brightness itself creates disability glare — the kind that temporarily washes out your vision when you look toward a fixture.
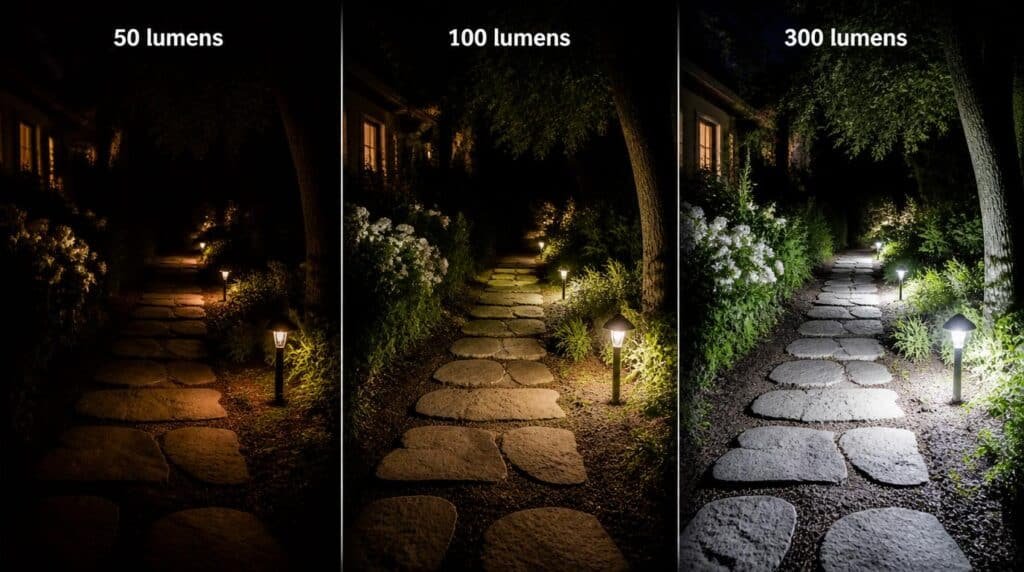
For residential pathways, the sweet spot I’ve found through years of trial and error is 50 to 200 lumens per fixture, depending on spacing and fixture height. Here’s my quick reference:
- Low bollard lights (12–18 inches tall): 50–100 lumens is plenty
- Standard path stakes (18–24 inches): 100–150 lumens
- Taller post lights (30+ inches): 150–200 lumens max
Color temperature matters just as much as lumens. Stick with warm white in the 2700K to 3000K range. This mimics natural firelight, keeps your night vision intact, and performs better in foggy or rainy conditions than cool white (5000K+), which scatters more in moisture. The International Dark-Sky Association backs this up — they recommend warm-toned lighting below 3000K for all outdoor residential applications.
Tip 4: Control Glare Before It Controls You
Remember that dangerous well-lit path I mentioned at the beginning? This is where I explain why it happens.
Glare is the silent saboteur of outdoor lighting safety. There are two types you need to worry about on pathways:
- Disability glare: Direct light hitting your eyes that physically reduces your ability to see. Think of an oncoming car’s high beams — same principle, smaller scale.
- Discomfort glare: Light that doesn’t blind you but causes squinting, eye strain, and the instinct to look away from the path surface — exactly where you should be looking.
Both types come from the same source: an exposed light source at or near eye level without proper shielding. This is why cheap solar stake lights with a bare LED on top are so problematic. That bare diode sits at about knee height — exactly where your downward gaze lands while walking.
My fix is simple. I only install fixtures with fully shielded or downward-directed light output. Look for path lights where you cannot see the LED bulb when standing upright and looking at the fixture from 6 feet away. The light should wash down onto the path surface, not spray outward into your eyes. Mushroom-cap and hat-top designs accomplish this naturally.
If you already own unshielded fixtures, you can retrofit small metal or plastic glare shields — I’ve even used a strip of aluminum flashing bent into a cone and painted black. Not pretty, but it works TBH.
Tip 5: Go Fully Automatic with Photocell Sensors
Why should pathway lights turn on automatically at dusk?
I touched on this earlier, but let me drive it home because it’s the core of the entire dusk to dawn concept. A pathway light that requires you to remember to turn it on is a pathway light that will be off the night someone falls.
Photocell sensors — those small, usually dome-shaped components on top of solar fixtures or wired into hardscape lighting systems — detect ambient light levels. When light drops below a preset threshold (typically around 5–15 lux), the circuit closes and the fixture powers on. At dawn, the process reverses.
What most people don’t realize is that not all photocells are calibrated equally. Cheap sensors sometimes activate too late (well after dark) or too early (shutting off during heavy overcast days). When I evaluate a fixture, I check two things:
- Activation threshold: Does it turn on at civil twilight (when you actually start needing light) or only at full astronomical darkness?
- Hysteresis gap: Does it cycle on and off repeatedly when ambient light fluctuates (like passing car headlights)? Quality photocells have a built-in delay to prevent this flickering.
For solar path lights specifically, the photocell is almost always integrated — it’s the same sensor that tells the charge controller to stop charging and start discharging. This means your choice of solar fixture directly determines your dusk-to-dawn reliability. Don’t cheap out here. A fixture with a poor photocell will leave you dark during the first 30 minutes after sunset — exactly when the most outdoor foot traffic happens.
Expert Commentary: This video from a professional landscape lighting installer walks through real-world placement and wiring decisions that directly affect nighttime safety. Pay close attention to the section on fixture height relative to eye level — it reinforces exactly why glare control is non-negotiable. Worth your time if you’re planning a hardwired system alongside solar.
Tip 6: Integrate Pathway Lighting with Home Security
Does a well-lit walkway actually deter burglars, or is that just something we tell ourselves to feel better about spending money on lights?
The data says yes — emphatically. The U.S. Department of Justice Bureau of Justice Assistance identifies improved outdoor lighting as a proven situational crime prevention strategy. Well-lit properties increase “natural surveillance” — the ability of neighbors, passersby, and security cameras to observe activity. Burglars consistently rank visible lighting among the top deterrents in offender interviews.
Here’s how I layer pathway lighting into a broader home security lighting strategy:
- Continuous low-level path lighting (dusk to dawn) eliminates hiding spots along walkways and property borders
- Motion-activated floodlights at entry points (doors, gates, garage) provide a startle response for anyone approaching off-path
- Camera-paired lighting ensures your security camera footage is actually usable — a camera in the dark captures nothing actionable
The key insight: pathway lights and security lights serve different functions and should never be combined into one fixture. Your walkway lights stay on all night at low, comfortable brightness. Your security lights blast on at high brightness only when triggered. Mixing these roles creates either constant glare (bad for walkway safety) or inconsistent path illumination (bad for fall prevention).
Tip 7: Maintain Your Lights Seasonally — The 5-Minute Routine
Want to know the difference between pathway lights that last 5+ years and pathway lights that die after one winter? It’s not the brand. It’s maintenance — and it takes about 5 minutes per quarter.
Every 3 months, I walk my pathway and do this checklist:
- Clean the solar panels (or lens covers on wired fixtures) with a damp cloth. Pollen, dust, and bird droppings can cut solar charging efficiency by 30–50%.
- Check fixture alignment. Lawn mowers, kids, pets, and frost heave knock lights off-angle. A tilted fixture throws light sideways instead of down onto the path.
- Trim encroaching vegetation. That ornamental grass looked great in May. By August it’s blocking three fixtures and creating a dark tunnel.
- Test the photocell. Cover the sensor with your hand — the light should activate within 10–15 seconds. If it doesn’t, the sensor may be degrading.
- Inspect for water intrusion. Condensation inside the lens cover means the seal has failed. Replace the fixture before corrosion kills the electronics.
For property managers overseeing multiple units, I build this into the quarterly grounds maintenance schedule. It adds maybe 20 minutes per building, and it prevents the slow decay where half the pathway lights go dark over six months and nobody notices until a tenant files an incident report.
Myth-Busting: “Brighter Pathways Are Safer Pathways”
This is the most persistent — and dangerous — myth in outdoor lighting safety. IMO it’s responsible for more bad purchasing decisions than any other misconception in the landscape lighting space.
The myth: If 100 lumens is safe, 500 lumens must be five times safer.
The reality: Excessive brightness on a narrow pathway creates a phenomenon lighting engineers call the “cave effect.” Your pupils constrict to handle the bright path surface, which makes everything outside the lit area appear as impenetrable blackness. You lose all peripheral vision. You can’t see the edge of the path. You can’t see the step down to the lawn. You can’t see the garden hose your kid left across the walkway 3 feet off the lit centerline.
Professional landscape lighting designers use a metric called uniformity ratio — the relationship between the brightest point and the dimmest point within a lit area. The Illuminating Engineering Society recommends a uniformity ratio no greater than 4:1 for pedestrian walkways. Translation: your brightest spot should be no more than 4 times brighter than your dimmest spot. Cheap, overpowered fixtures routinely produce ratios of 10:1 or worse.
The fix? More fixtures at lower brightness beats fewer fixtures at higher brightness — every single time. Six 80-lumen lights will always outperform three 200-lumen lights on a 40-foot pathway. This is the insider knowledge that separates someone who “put up some path lights” from someone who built a genuinely safe walking surface.
Frequently Asked Questions
What is dusk to dawn pathway lighting and how does it improve safety?
Dusk to dawn pathway lighting uses built-in photocell sensors to turn on automatically at sunset and off at sunrise. It improves safety by providing consistent illumination across walkways all night, eliminating dark spots where trips, falls, or security blind spots could occur — without requiring manual operation.
How far apart should pathway lights be spaced for safe walking?
For safe walking conditions, space pathway lights every 6 to 8 feet apart on straight sections and every 4 to 5 feet around curves, steps, or grade changes. The goal is overlapping light pools so no dark gaps exist between fixtures.
How many lumens do I need for safe pathway lighting?
Most residential pathways need between 50 and 200 lumens per fixture. The sweet spot for safety without glare is typically 100 lumens per light with warm white color temperature between 2700K and 3000K. Avoid exceeding 300 lumens per fixture on narrow walkways as it creates harsh glare.
Are solar dusk to dawn path lights bright enough for safety?
Modern solar path lights with quality monocrystalline panels and lithium-ion batteries absolutely provide enough brightness for walkway safety. Look for models rated at 50 to 150 lumens with at least 8 hours of runtime. Cheap budget models under 10 lumens will not provide adequate safety illumination.
Does pathway lighting reduce home burglary risk?
Yes. According to the U.S. Department of Justice, improved exterior lighting is one of the most effective environmental deterrents against residential burglary. Well-lit pathways eliminate hiding spots, increase natural surveillance from neighbors, and signal that a property is actively maintained and monitored.
What is the best color temperature for outdoor pathway safety lights?
Warm white between 2700K and 3000K is the best color temperature for pathway safety. It provides comfortable visibility without disrupting night vision adaptation. Cool white above 5000K causes more glare and has been shown to scatter more in fog and rain, reducing effective visibility.
My Top Recommended Gear
These are the products I actually use and recommend to clients. No filler, no sponsored picks — just stuff that works reliably season after season.
- LITOM Solar Pathway Lights (Warm White, 4-Pack) — My go-to for most residential installs. Solid 100-lumen output, fully shielded mushroom-cap design that eliminates glare, and a reliable photocell that kicks on right at civil twilight. These have survived three New England winters on my own property.
- SOLPEX Stainless Steel Solar Path Lights (12-Pack) — Best value pick for property managers or anyone with long walkways to cover. Lower per-unit lumen output (around 40 lumens), but the 12-pack lets you achieve that tight 5–6 foot spacing that creates beautiful overlapping light pools without breaking the budget.
- URPOWER Solar Spot Lights Outdoor (2-in-1, 2-Pack) — I use these specifically for hazard zones — steps, grade changes, and transition areas where I need directional, adjustable brightness. The 200-lumen output with adjustable head angle lets me wash light exactly where it’s needed at tricky spots without adding glare to the main path.
Disclaimer: This post contains affiliate links. As an Amazon Associate, I may earn a commission from qualifying purchases at no additional cost to you. I only recommend products I’ve personally tested or rigorously researched.