Perfect Solar Path Lights for Driveway Edges Guide
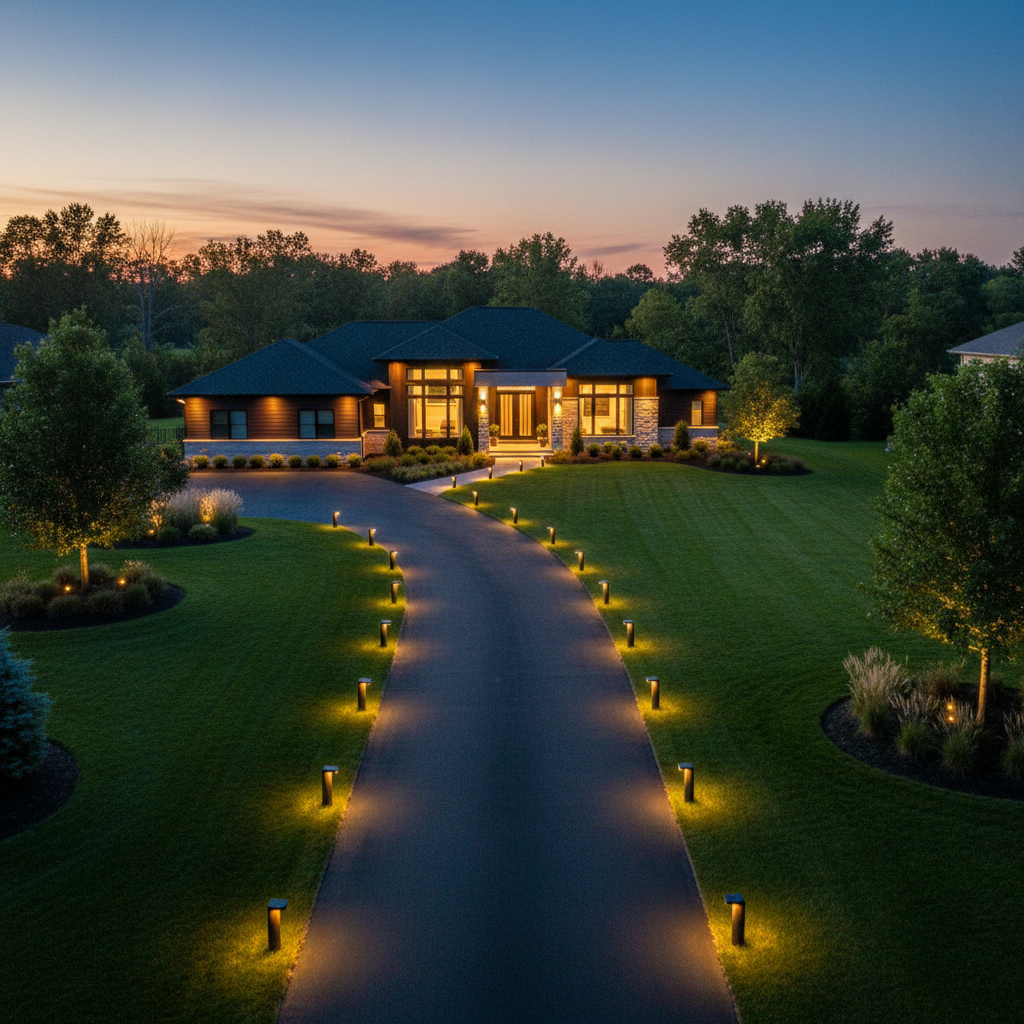
Let me guess—you’ve backed into your own lawn at least once because you couldn’t see where your solar path lights for driveway edges should’ve been. I’ve consulted on hundreds of residential lighting projects, and driveway edge definition is the most underestimated safety upgrade homeowners skip. The problem isn’t just aesthetics; it’s that awkward moment when your guest’s Tesla straddles your flower bed at 9 PM. Most people either overlight (wasting money and creating glare) or space fixtures so randomly they look like a half-finished game of lawn darts. The fix? Strategic layouts based on actual driveway geometry, not guesswork.
Table of Contents
- Why Driveway Edges Need Different Rules Than Walkways
- The 3 Core Starter Layouts (Copy-Paste Ready)
- Spacing Science: When to Break the 8-Foot Rule
- One Side vs. Two-Side Lighting (The Width Test)
- Curve and Corner Strategy
- 5 Mistakes I See Every Week
- FAQ
- My Top Recommended Gear
Why Driveway Edges Need Different Rules Than Walkways
Driveway edge lighting isn’t just “walkway lights turned sideways.” The purpose shifts from illuminating a walking surface to creating visual lane markers. Think about it—when you’re walking a path, you need to see potential trip hazards. When you’re driving or backing up, you need spatial reference points that tell your brain “the pavement ends HERE.”
I learned this the hard way during a 2019 project in Portland where the homeowner insisted on using the same 25-lumen decorative fixtures they’d installed on their front walkway. Looked gorgeous during the day. At night? The glare from those lights actually made it harder to judge the driveway edge because their eyes kept adjusting to the bright spots instead of reading the continuous line. We swapped them for 15-lumen driveway marker solar lights with downward-focused optics, and suddenly the layout made sense.
The U.S. Department of Energy notes that proper outdoor lighting should enhance visibility without causing glare—a principle that applies double for vehicle areas. Your eyes process driveway edges peripherally while focusing on the path ahead, so you need consistent, moderate-output fixtures rather than spotlight-style blasters.
The 3 Core Starter Layouts (Copy-Paste Ready)
After the first paragraph of this section, here’s your quick answer: The most effective starter layout for standard driveways is single-side placement with 8-foot spacing along the dominant edge (typically the side nearest landscaping or drop-offs), starting 2 feet from the street entrance and ending 2 feet before the garage. This creates a visual guideline using 6-8 fixtures for a typical 50-foot driveway while minimizing costs and maintenance.
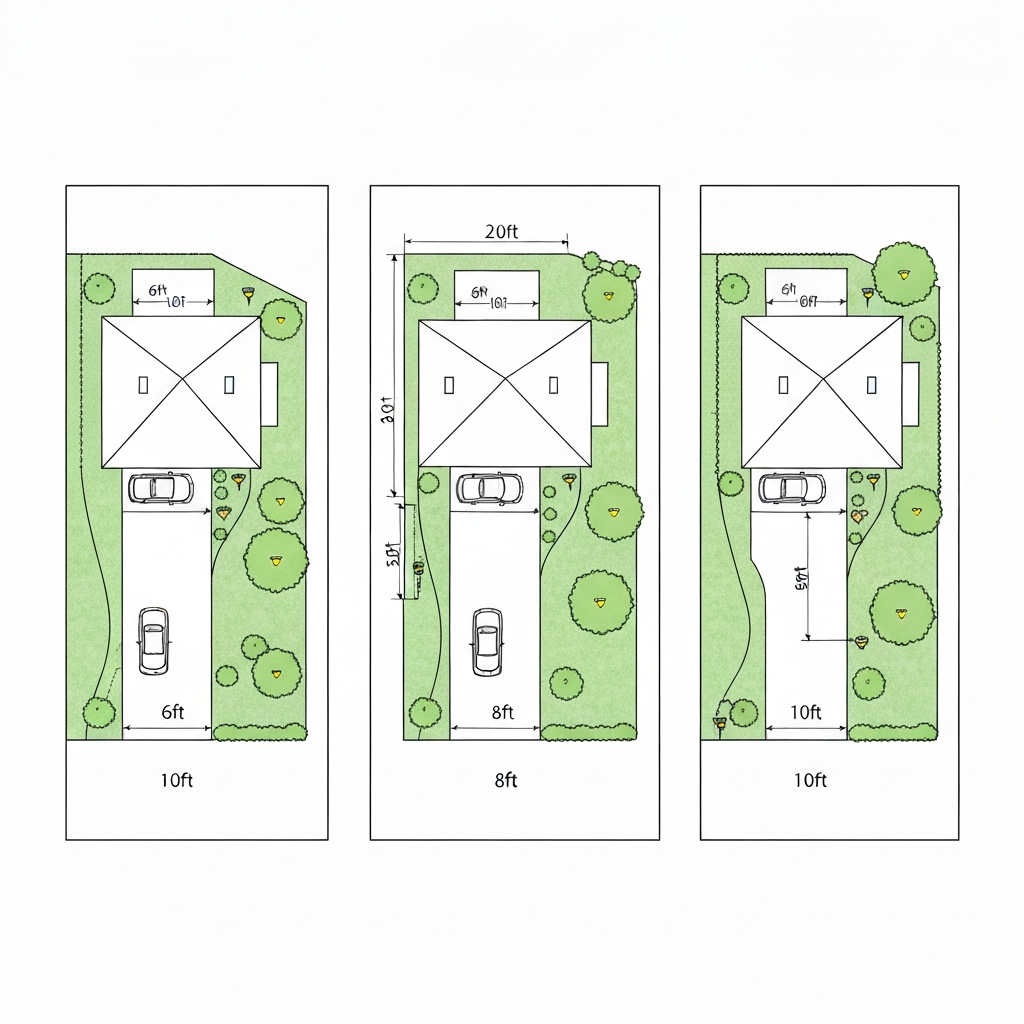
Layout 1: The Single-Side Essential
Best for: Driveways under 12 feet wide, straight or gentle curves, budgets under $150
- Place lights on the “risk side” (wherever there’s a lawn edge, slope, or landscaping)
- 8-foot spacing for straight runs
- 6-foot spacing for any section with curves or poor sight lines
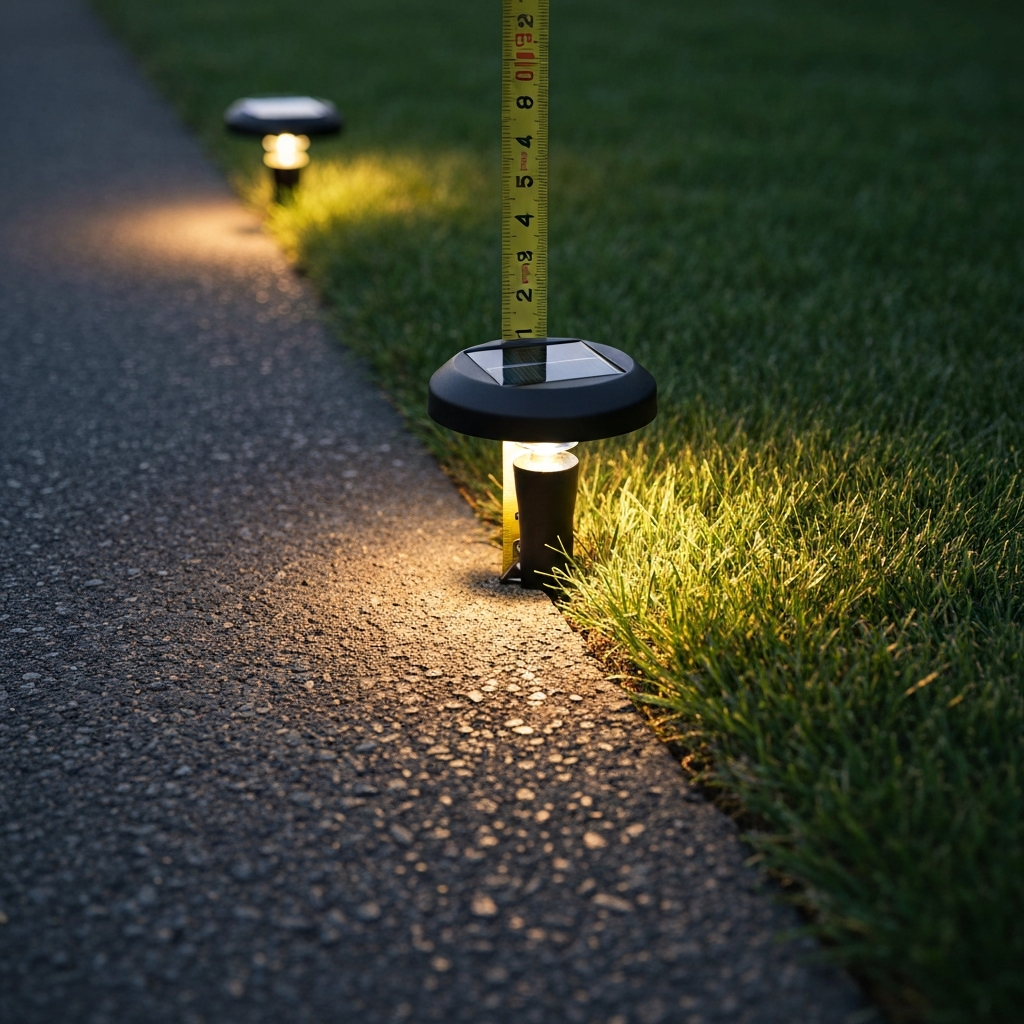
- Position fixtures 6-10 inches outside the paved edge (never on the pavement itself)
- Total fixture count: Measure driveway length in feet, divide by 8, add 1
I use this layout for about 60% of my residential clients. It’s the Pareto principle in action—you get 80% of the safety benefit for 20% of the cost compared to elaborate dual-side setups.
Layout 2: The Dual-Side Definer
Best for: Driveways 15+ feet wide, shared driveways, homes with frequent guests
- Mirror fixtures on both edges using alternating or direct-opposite placement
- Alternating: Offset lights by 4 feet so they zigzag (creates rhythm)
- Direct-opposite: Match positions exactly across from each other (creates formality)
- Use 10-foot spacing to avoid the “landing strip” effect
- IMO, alternating looks better and costs less—you maintain 8-foot perceived spacing with fewer fixtures
Check out the solar path light layout ideas for walkways for principles that translate well to symmetrical driveway designs.
Layout 3: The Hybrid Corner Emphasis
Best for: L-shaped or curved driveways, tight parking areas
- Single-side lighting on straight sections (8-foot spacing)
- Switch to dual-side for 15-20 feet before and after any significant curve or corner
- Tighten spacing to 5-6 feet in the curve zone itself
- Marks the “danger zones” without overlighting the entire run
This is my go-to for properties where the driveway does something weird—and let’s be honest, most driveways do something weird.
Spacing Science: When to Break the 8-Foot Rule
The industry-standard 6-8 foot spacing recommendation (which I detail in my solar path light spacing guide) works for most scenarios, but driveways throw curveballs. Here’s when I deviate:
Go tighter (5-6 feet) when:
- Your driveway curves sharply (any turn over 30 degrees)
- There’s a significant slope or grade change
- The edge borders a ditch, retaining wall, or drop-off
- Ambient light is minimal (rural properties, heavy tree cover)
Go wider (10-12 feet) when:
- You have excellent street lighting or porch lights that already provide context
- The driveway is perfectly straight and flat
- You’re doing dual-side alternating placement (visual spacing appears tighter)
- Budget or maintenance capacity is limited
According to visibility research, human peripheral vision processes pattern continuation rather than individual light sources. That’s why consistent spacing matters more than brightness—your brain “connects the dots” to establish the edge line.
💡 Pro Recommendation: Solar Landscape Lighting System
If you’re planning a complete driveway edge upgrade, I’ve been recommending the Outdoor Solar Lights Blueprint to my consulting clients. It’s a comprehensive installation system that covers everything from voltage calculations to weather-proofing techniques most DIY guides skip.
Covers solar panel positioning, battery optimization, and layout templates for 12+ property types.
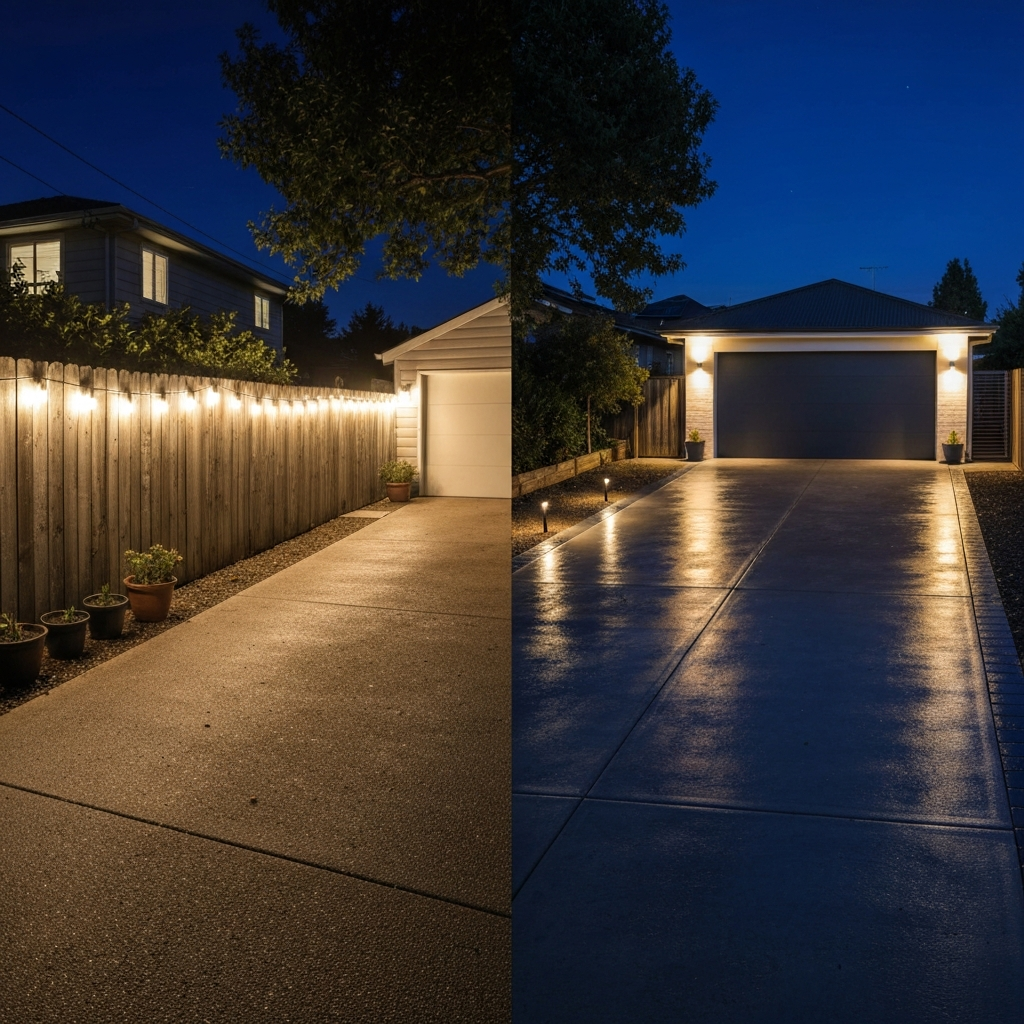
One Side vs. Two-Side Lighting (The Width Test)
Here’s my simple decision framework: Stand at the end of your driveway at dusk. If you can’t clearly see both edges simultaneously in your peripheral vision while looking straight ahead, you need dual-side lighting. If you can easily track both edges, save your money and go single-side.
Most residential driveways fall between 10-14 feet wide—right in that gray zone. For these, I consider secondary factors:
- Traffic frequency: Multiple drivers or elderly users? Go dual-side for redundancy.
- Seasonal conditions: If you get snow that obscures one side, dual-side provides backup.
- Resale value: Dual-side looks more “finished” in listing photos (real estate agents notice this stuff).
- Existing hardscape: If you already have defined edges (pavers, Belgian block), single-side is fine.
The worst mistake? Installing dual-side lighting on a narrow driveway with fixtures that are too bright. You create a tunnel effect that’s actually disorienting. Been there, fixed that, learned the lesson.
Curve and Corner Strategy
Curves are where most DIY installations fall apart. People maintain their straight-section spacing through the curve, which leaves gaps in the visual line right where you need it most. Physics reminder: when you’re following a curve, you’re looking tangent to it, not straight down it. That changes your sight lines dramatically.
My curve formula: Reduce your standard spacing by 25-30% through any curve section. If you’re using 8-foot spacing on straights, drop to 6 feet through curves. Start the tighter spacing about 10 feet before the curve begins and maintain it until 10 feet after it ends.
For 90-degree corners (like where a driveway meets a parking pad), I place a fixture at the exact apex of the turn, then work backward with standard spacing. This “anchor point” method ensures the critical decision point is always marked, and you build the layout from there.
Want to match your driveway lights to your home’s style? My guide on how to choose solar path lights that match your home covers design cohesion strategies that work for both walkways and driveway applications.
5 Mistakes I See Every Week
1. Installing Lights ON the Pavement Edge
I cannot stress this enough: your fixtures will get destroyed by tires, snow plows, and lawnmower wheels. Position them 6-12 inches into the lawn or landscape bed, parallel to the edge. The visual line still reads correctly, but your lights actually survive past spring.
2. Forgetting the Entry Transition
Your driveway edge lights should “hand off” to your street or walkway lighting, not just abruptly start 20 feet up the driveway. Place your first fixture 2-3 feet from where the driveway meets the street or sidewalk. This creates a clear entry portal.
3. Using Walkway-Style Fixtures
Those decorative 24-inch shepherd’s hooks look adorable on garden paths. On driveways, they get clipped by mirrors and create glare in side windows. Choose low-profile driveway border lighting ideas—fixtures under 15 inches tall with downward or side-directed light output.
4. Ignoring Solar Panel Orientation
If your driveway runs east-west and you install fixtures with fixed north-facing panels, you’ll get maybe 40% of rated performance. Either choose fixtures with adjustable panels or position them to maximize southern exposure. The National Renewable Energy Laboratory provides detailed solar exposure data if you want to get technical about it.
5. The “Buy Cheap, Install Twice” Trap
Look, I get it—the $3-per-fixture Amazon specials are tempting. I’ve tested dozens of budget lights. They last 8-14 months before the batteries fail or the solar panels oxidize. Mid-range fixtures ($15-25 each) with replaceable NiMH batteries will serve you for 3-5 years. Do the math on your time spent reinstalling, and quality pays for itself.
Frequently Asked Questions
How far apart should solar path lights be on driveway edges?
For driveway edges, I recommend spacing solar path lights 6-10 feet apart. Standard residential driveways work best with 8-foot intervals, while curved or darker areas benefit from tighter 6-foot spacing for continuous visibility.
Should I line both sides of my driveway with solar lights?
It depends on your driveway width and purpose. Driveways under 12 feet wide typically need only one-side placement. Wider driveways (15+ feet) or those with frequent nighttime traffic benefit from dual-side layouts for clearer lane definition.
What lumens do I need for driveway marker solar lights?
Driveway edge lighting requires 10-25 lumens per fixture. These aren’t meant to illuminate the entire surface—they’re visual markers. I’ve found 15-lumen fixtures hit the sweet spot for suburban settings without creating glare.
Can solar driveway lights withstand vehicle traffic?
Standard solar path lights should never be placed where tires can hit them. Position them 6-12 inches outside the paved edge. If you need in-ground driveway lights that handle weight, look for dedicated solar driveway markers rated for vehicle loads (typically 5+ tons).
How do I calculate how many lights I need?
Measure your driveway length in feet, divide by your chosen spacing (usually 8 feet), then add 1. For example: a 50-foot driveway ÷ 8-foot spacing = 6.25, round up to 7 fixtures for single-side installation. Double that number for dual-side layouts.
Will solar lights work in shaded driveways?
Partial shade reduces performance but doesn’t eliminate it. Modern solar path lights need about 4-6 hours of direct or bright indirect sunlight daily. If your driveway is heavily shaded, consider fixtures with remote solar panels you can position in sunnier spots, or look into low-voltage wired alternatives.
My Top Recommended Gear
After field-testing solar driveway lighting for nearly a decade, these are the product categories I actually recommend to clients (and use on my own property 🙂
1. Mid-Range Solar Path Light Sets
You want weatherproof construction, adjustable solar panels, and replaceable batteries. Sets of 8-12 fixtures typically offer the best per-unit pricing for driveway projects.
Browse Top-Rated Solar Driveway Light Sets →
2. Heavy-Duty Solar Driveway Markers
For those who need in-ground, vehicle-rated fixtures (especially for shared driveways or commercial applications), aluminum housing and polycarbonate lenses are non-negotiable.
Check Heavy-Duty Solar Driveway Markers →
3. Replacement NiMH Batteries
Most solar lights use AA-sized NiMH rechargeable batteries. Keep a spare set on hand—you’ll thank me in year two when a couple fixtures start dimming early. Way cheaper than replacing entire units.
Shop Solar Light Replacement Batteries →
There you have it—the driveway edge lighting layouts I’ve refined through hundreds of installations and more than a few “learning experiences” (read: mistakes that cost me credibility and redo time). The beauty of solar driveway guide lights is that they’re forgiving during installation. You can test a layout for a week, then adjust spacing before the ground settles. Start with one of these three core layouts, adapt for your specific curves and width, and you’ll have a driveway that’s both safer and significantly better-looking after dark. Now get out there and stop hitting your own landscaping.
Disclaimer: This post contains affiliate links. As an Amazon Associate and ClickBank Partner, I may earn a commission from qualifying purchases at no additional cost to you.