Solar Path Light Spacing Guide: 6–8 Ft. Rule That Works
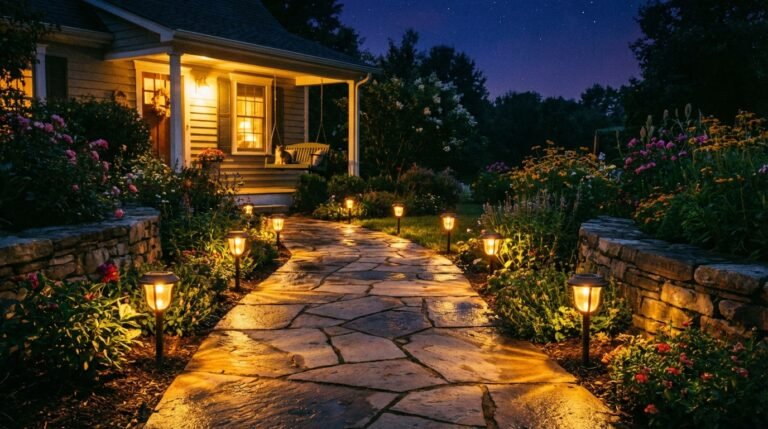
If you’re searching for a solar path light spacing guide, you’re probably dealing with the same mess I see every week: lights that look amazing on the product page… then turn your walkway into a dotted line of sadness. The problem is almost never “solar doesn’t work.” It’s spacing, beam shape, and unrealistic expectations.
Fast forward to tonight: you’ve got guests coming, the path has a weird turn, and your “walkway solar light spacing” plan is basically vibes. Let’s fix that with real rules—plus which lights are worth buying (and which ones should be exiled to the backyard compost area).
Table of Contents
- The solar lights spacing rule that actually works
- How to measure spacing without overthinking it
- Brightness vs spacing: why “more lumens” can look worse
- Buying + reviews: what to buy for clean walkway lighting
- Install like a pro: layout patterns that hide flaws
- Frequently Asked Questions
- The insider takeaway
The solar lights spacing rule that actually works
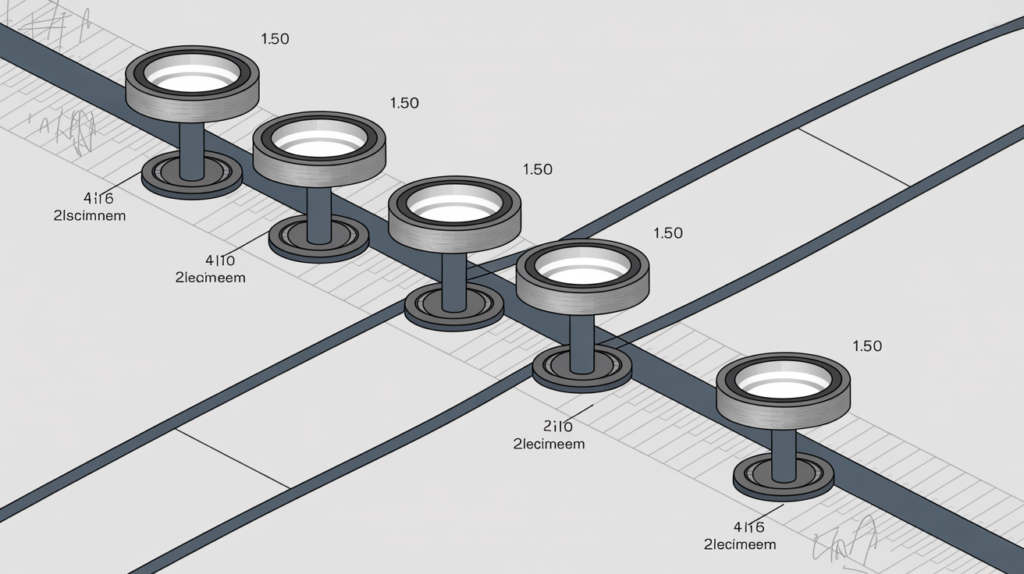
Start at 6–8 feet apart for most walkways. Tighten to 4–6 feet if the lights are dim, the path has steps/curves, or you’re lighting from one side only. If the fixtures are genuinely bright with a wide diffuser, 8–10 feet can work. That’s the core “how far apart solar path lights” answer.
Now the real-world nuance (because the internet loves pretending every yard is a flat, perfect rectangle):
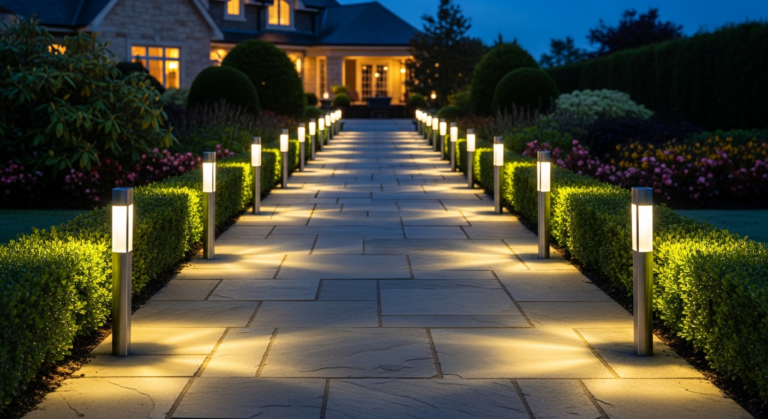
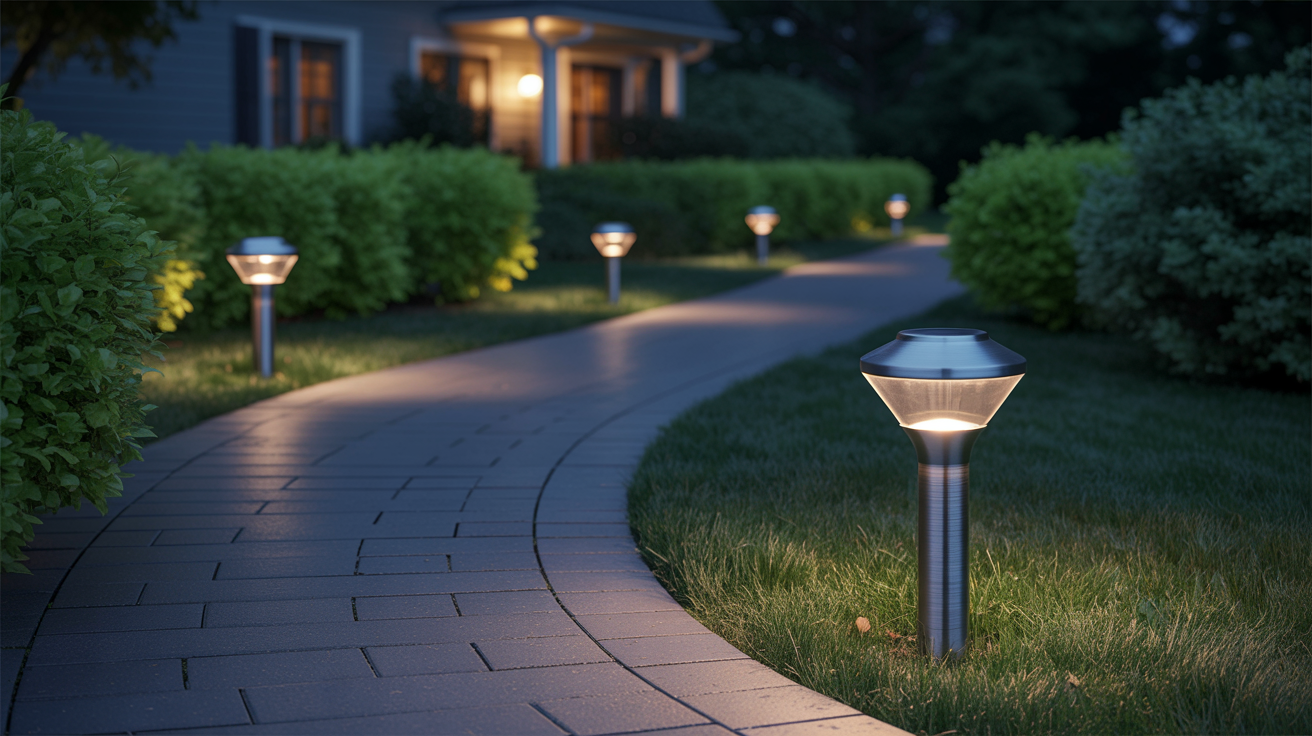
- Two-side placement (classic runway): 6–8 feet apart, staggered is usually best.
- One-side placement (common in narrow paths): 4–6 feet apart to avoid the “dark edge” problem.
- Curves, steps, uneven pavers: treat these as “hazard zones” and tighten spacing by 20–30%.
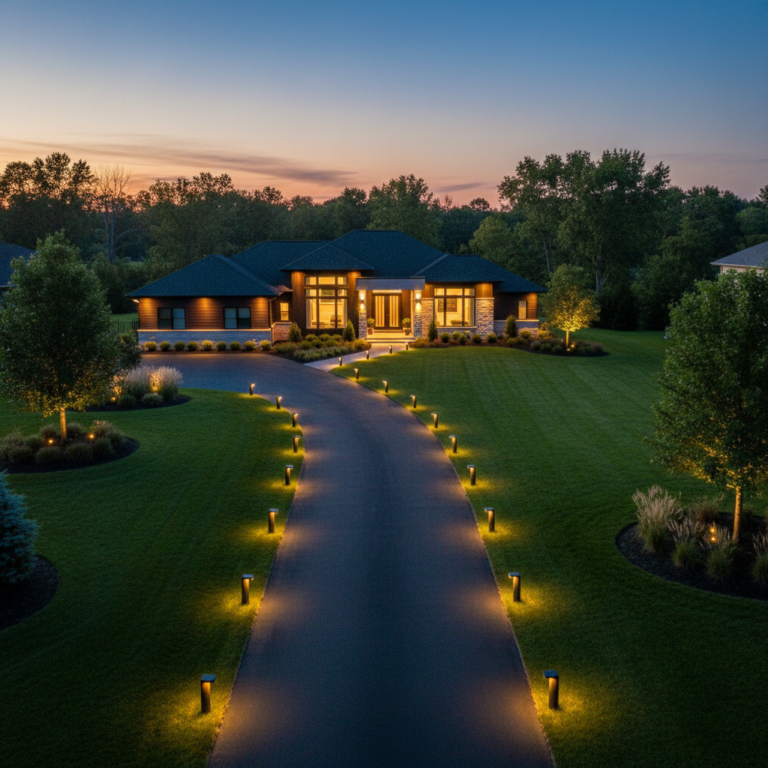
- Driveway edges: 8–12 feet is normal because you’re guiding, not spotlighting.
Bottom line: spacing is a safety decision first, a design decision second. When you read “path light spacing distance” recommendations, check whether they’re talking about visibility or aesthetics—because those are not the same goal.
Also: if you care about a clean, intentional look (not “yard sale lighting”), skim this for design patterns you can steal: solar path lights design ideas pros actually use.
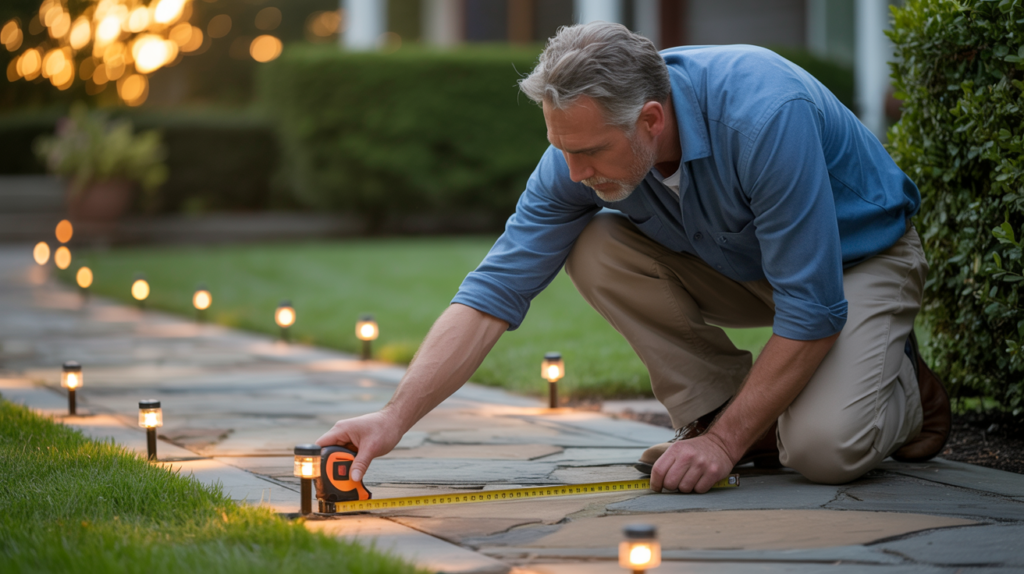
How to measure spacing without overthinking it
You don’t need a CAD model of your walkway. You need a repeatable process that gets you 90% right on the first try.
Step 1: Decide the job (guide vs illuminate)
Guide lighting means you just want edges visible—think driveway border or garden path. Illuminate lighting means you want enough light to see surface detail—steps, cracks, changes in elevation.
If you’re in “guide” mode, you can space farther. If you’re in “illuminate” mode, you tighten up. Simple.
Step 2: Use human-scale spacing, not math-scale spacing
Here’s the veteran trick: use your stride. A relaxed adult step is roughly 2.5–3 feet. That means:
- 4–6 feet = about 2 steps (tight spacing, safer, more uniform)
- 6–8 feet = about 3 steps (default, balanced)
- 8–10 feet = about 3–4 steps (only if lights are strong and wide)
Mark spots with painter’s tape or little stones, wait until dark, then move them. Yes, it’s low-tech. It also works.
Step 3: Understand what “even” lighting actually means
Even lighting doesn’t mean “same brightness everywhere.” It means no jarring bright dots and no black holes. If your lights create intense circles, you’ll need tighter spacing or better optics (diffusers/lenses).
If you want a nerdy unit behind the vibe: illuminance is commonly measured in lux or foot-candles. A foot-candle is defined as one lumen per square foot (and it converts to about 10.764 lux). That’s not trivia—it’s why “a little more light” can be a measurable thing. See: foot-candle definition and illuminance overview.
Brightness vs spacing: why “more lumens” can look worse
Here’s the truth: a brighter solar light can make your walkway look uglier. Not because brightness is bad—because bad optics are common.
Many bargain solar lights use a tiny LED with a clear cover that throws a harsh hotspot. That creates “polka-dot lighting.” You can tighten spacing, sure, but you’re basically spending more lights to compensate for a bad design. That’s not savings. That’s a tax.
The three spacing killers
- Narrow beam + high hotspot: bright circles, dark gaps. Looks cheap.
- Unstable battery performance: half your lights are weaker by 10pm, so spacing gets weird.
- Mixed color temperatures: alternating warm/cool lights makes spacing look inconsistent even if it isn’t.
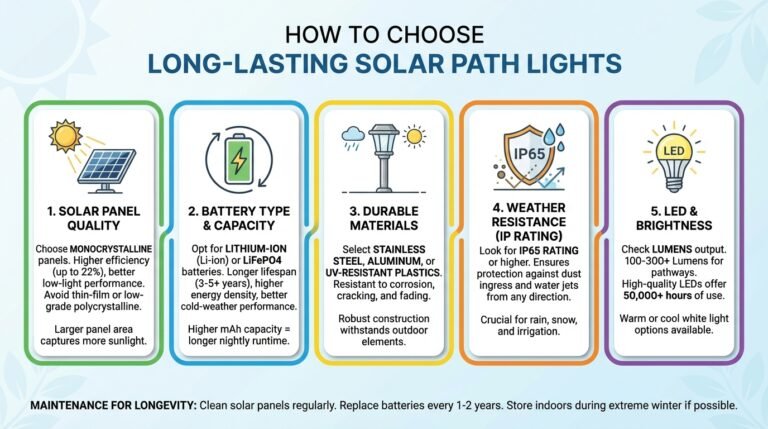
If you want lighting that feels intentional, prioritize diffusers, consistent battery chemistry (often NiMH or Li-ion depending on the model), and matched fixtures.
For practical lighting guidance beyond backyard opinions, the U.S. National Park Service has a solid set of principles on aiming light only where needed and minimizing glare/spill—good ideas even if you don’t live next to a dark-sky park: NPS outdoor lighting principles.
Glare note: if your lights punch you in the eyeballs when you’re walking toward them, spacing isn’t the only problem. Placement height and shielding matter. This is also why I’m allergic to “too tall” path lights that act like mini streetlamps.
Buying + reviews: what to buy for clean walkway lighting
Let’s talk purchasing without pretending every product is magical. Your spacing plan depends on your light’s real-world output and beam shape, so your buying decision is part of your spacing decision. Yep. Welcome to adulthood.
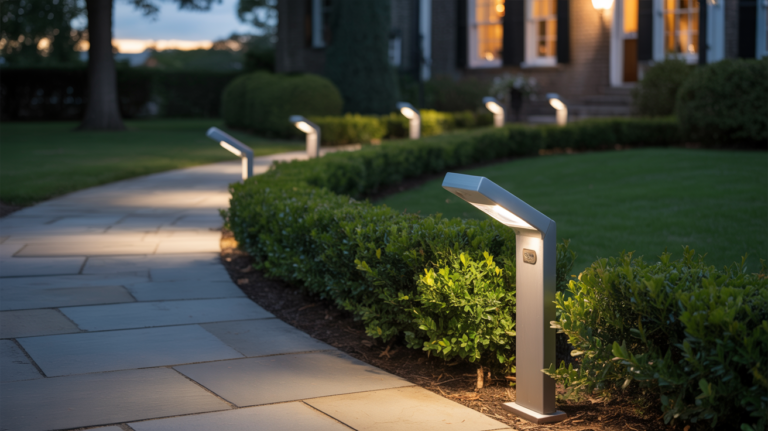
Category 1: “Soft-edge” path lights (best for most homes)
These are the easiest to space. They use a diffuser or frosted lens so you get a usable pool of light instead of a laser dot. If you want the classic look, start at 6–8 feet apart and adjust from there.
What sucks (and why): ultra-cheap packs with clear caps often look like runway markers, not walkway lighting. If your goal is “see where you’re stepping,” that’s a fail.
Category 2: Higher-output path lights (best for steps + hazards)
If you’ve got stairs, uneven stone, or older family members visiting, you want brighter lights with better optics. You can often space these a bit farther, but only if the beam stays wide and not glarey. If the beam is narrow, spacing farther just makes the gaps darker.
Want a quick sanity check on pedestrian-focused lighting performance and how people perceive brightness? The U.S. Department of Energy’s GATEWAY program has documented pedestrian-scale outdoor lighting projects—worth skimming if you’re optimizing for real walking humans, not product photos: DOE GATEWAY pedestrian lighting report (PDF).
Category 3: Solar “smart” path lights (fun, pricey, not mandatory)
Smart path lights can be great for timers, zoning, and motion triggers. But don’t let “smart” distract you from layout. A badly spaced smart system is still badly spaced—just with an app.

If you want your lights to match the house style (modern, farmhouse, Mediterranean, “I have taste”), don’t guess. Use this as your reference for selecting shapes/finishes that don’t clash: how to choose solar path lights that match your home.
Install like a pro: layout patterns that hide flaws
Spacing isn’t just a number. It’s also geometry. The same lights can look premium or chaotic depending on the pattern.
Pattern 1: Staggered “zipper” layout (my default)
Best for: most walkways, especially 3–5 feet wide.
Instead of placing lights directly opposite each other, stagger them like a zipper. Why? Because it smooths out the perceived gaps. Your eyes read it as continuous guidance rather than “pairs of dots.”
- Start 12–18 inches from the walkway edge (so you’re lighting the walking surface, not the shrubs).
- Place the first light on the left, then the next on the right 3–4 feet ahead (half-step offset).
- Continue at your chosen spacing (6–8 feet default) while maintaining the offset.
Pattern 2: One-side tight spacing (when you can’t do two sides)
Best for: narrow paths, fence-side walkways, planting-bed constraints.
If you’re forced into one-side lighting, don’t pretend it’s two-sided. Tighten to 4–6 feet and keep the fixtures aligned. Curves get extra lights. Yes, extra. Safety beats symmetry.
Pattern 3: “Hazard clustering” (the grown-up move)
Best for: steps, transitions, uneven pavers, slopes.
Most people space lights evenly like robots. Pros “cluster” where the risk is. Put lights closer together near hazards and let them breathe on straight, flat sections.
If you want a bunch of layout patterns with visuals (and fewer regrets), steal from this: solar path light layout ideas for walkways.
Quick troubleshooting: if it still looks bad
- Uneven brightness: check panel shading, clean the panels, and replace mismatched batteries (don’t mix “random drawer batteries” with new ones).
- Too much glare: lower the fixture angle (if adjustable) or choose a hat-style shielded light.
- Still patchy: tighten spacing by one “step” (about 2–3 feet) and reassess.
One more external reality-check: exterior lighting is often overdone, and “more light” isn’t always safer if it creates glare or harsh contrast. DOE’s exterior lighting guidance talks about identifying overlit areas and using appropriate levels—useful mindset even at home: DOE exterior lighting for savings, security, and safety (PDF).
Frequently Asked Questions
How far apart should solar path lights be on a normal walkway?
Start at 6–8 feet apart. If the lights are dim, the walkway is uneven, or you’re placing lights on one side only, tighten to 4–6 feet. If the lights are genuinely bright with a wide diffuser, 8–10 feet can work.
What’s the best spacing if I only place lights on one side of the path?
Use 4–6 feet apart for one-side layouts. This reduces dark gaps on the far edge of the walkway. Add extra lights at curves, steps, or where the path narrows—those are the trip zones.
Does lumen output actually matter for spacing, or is it just marketing?
It matters, but beam pattern matters as much as lumens. A high-lumen narrow beam can create harsh hot spots and dark gaps. A moderate lumen light with a good diffuser often looks more uniform and lets you space lights farther without the “polka dot” effect.
Why do my solar path lights look uneven or “patchy” at night?
Patchy runs come from charging inconsistency (shade, dirty panels, weak batteries) and mixed fixtures (different models, ages, or color temperatures). Fix charging first, then adjust spacing. Also avoid alternating warm/cool lights—it makes spacing look inconsistent even when it’s not.
The insider takeaway
The best spacing rule is boring, and that’s why it works: default to 6–8 feet, tighten to 4–6 feet for hazards or one-side installs, and only go 8–10 feet if the light has a wide, diffused beam and consistent output.
Buy lights with good optics first, then space them. Not the other way around.
And if your walkway still looks like an airport taxiway… congrats, you’ve discovered why lighting designers get paid. Now go tighten the spacing by one stride and pretend you meant to do it that way.
As an Amazon Associate, I earn from qualifying purchases.