Solar Path Lights Sensor Not Working? Get It Working Again
Is a simple battery swap or a quick reset all that stands between you and reliable dusk-to-dawn lighting? Many homeowners blame the sensor, but the real cause is often easy to fix.
This guide shows a clear diagnostic order: confirm the light can switch modes, verify it charges, then decide if a repair or replacement is needed. Start with the fastest checks you can do in minutes—test the detector, move the unit away from porch or street glare, clean the lens and panel, or power-cycle the fixture.
Most failures trace to worn rechargeable cells, blocked sun, or a dirty panel. A knocked-over unit can usually be restored with a reset. Tools are basic: a soft cloth, mild soap, and a small screwdriver for the battery compartment.
Goal: have the lights working tonight or reach a confident decision to replace a battery, module, or entire lamp based on simple evidence.
Table of Contents
Key Takeaways
- Most complaints are dimming, flicker, or early shutoff—not a dead sensor.
- Quick checks: move from bright fixtures, clean the panel, and try a reset.
- Worn rechargeable batteries are a common, inexpensive fix.
- Follow a simple diagnostic order to avoid unnecessary replacement.
- Tools needed are minimal and likely on hand for typical U.S. homes.
- By following steps, you’ll either restore operation tonight or know which part to replace.
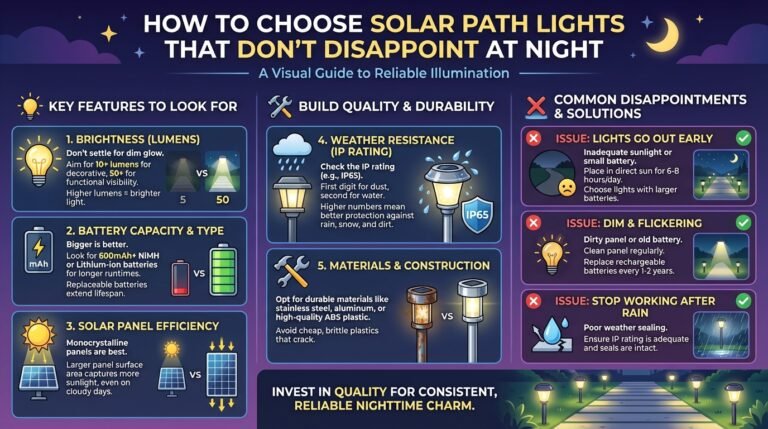
How Solar Path Light Sensors Work and What “Not Working” Usually Means
A tiny light detector measures ambient brightness and tells the fixture when to shift from charge mode to glow mode.
What the detector reads at day and night
The panel gathers energy during the day, topping up rechargeable batteries. When dusk falls, the light detector senses lower brightness and allows the LED to run on stored power.
Symptoms that point to the detector versus the battery or panel
Detector problems show as lights that come on in daylight or refuse to turn on unless you cover the detector. If covering the detector makes it glow, the detector is responsive and placement or stray glare is the likely issue.
Battery or charging problems look different: after a sunny day the output is dim, runtime is short, or the LED flickers. That points to worn rechargeable batteries, a dirty panel, or poor sun exposure. A properly charged unit should last most of the night, though runtime varies by battery age, panel size, and season.
“Distinguishing detector faults from power faults saves time and avoids needless part swaps.”
Next, we’ll run fast checks ordered from easiest to more involved diagnostics.
troubleshooting guide and safety and security resources can help when you need examples or best practices.
Solar path lights sensor not working: Fast Troubleshooting Checks That Fix Most Issues
Start small and sort the simple fixes first. Run a quick test at dusk to see if the unit responds to darkness before you pull apart the housing.
Do a quick test by blocking light
Wait until evening, then cover the panel completely. If the light turns on promptly, the detector is responding and ambient glare is the likely issue.
Move units away from porch or street glare
If nearby yard or street lights keep the device from turning on, increase distance or change the angle so artificial light does not hit the sensor window directly.
Reset with a power cycle
Switch OFF, wait ~30 seconds, then switch ON. Retest after dark to clear glitches caused by wind or bumps.
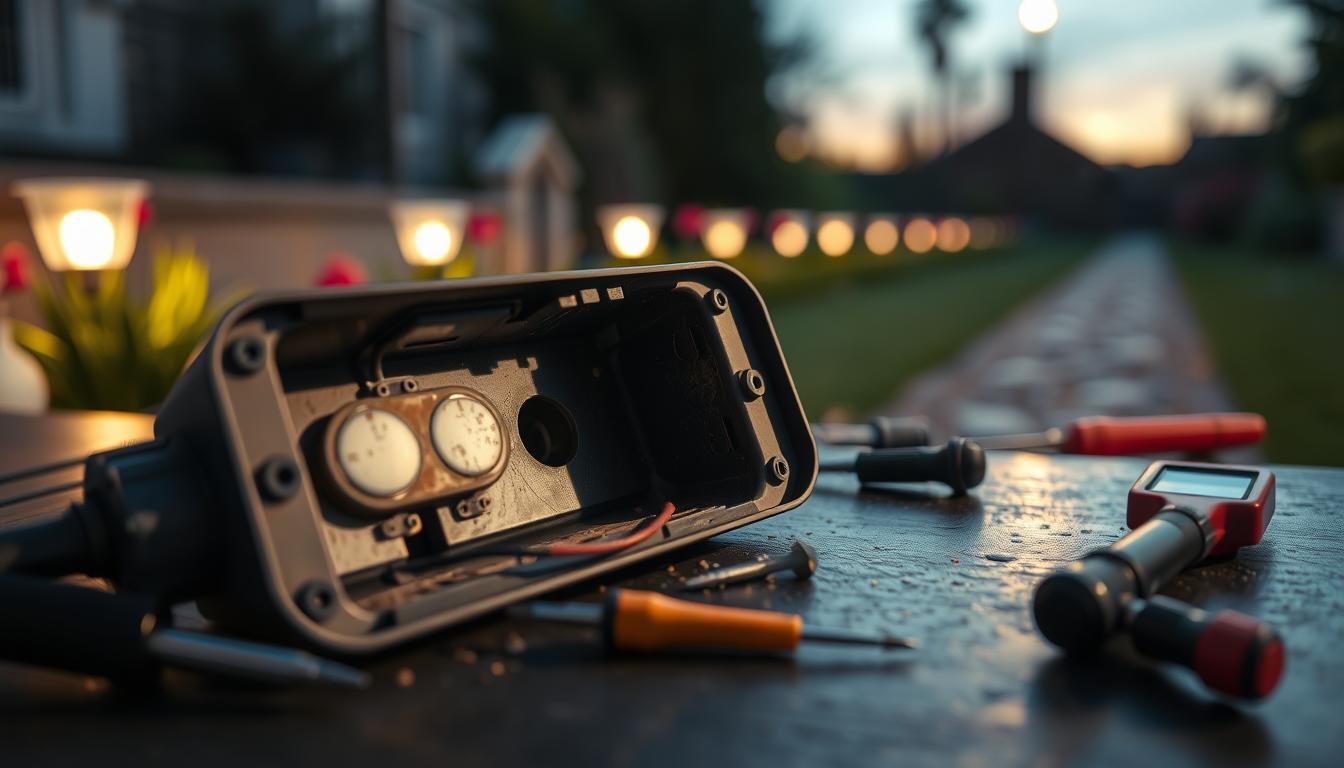
Clean the lens and check connections
Use a soft cloth to remove dirt and grime from the lens. Open the housing if safe and inspect terminals for loose connections, corrosion, or moisture near wiring.
| Check | How to Do It | What It Means |
|---|---|---|
| Cover test | Block panel at night | Turns on = detector OK; stays off = next steps |
| Relocate | Move away from artificial lighting | Improved response if glare was the issue |
| Power cycle | OFF 30s, then ON | Clears simple electronic faults |
| Inspect contacts | Look for corrosion or loose wiring | Corrosion needs repair or replacement |
Quick tip: if heavy corrosion or damaged insulation appears, treat it as a likely failure point and move to parts replacement. For a step-by-step troubleshooting guide with repair examples, follow the link.

Fix Charging Problems That Look Like Sensor Failure
A weak charge during the day can make a perfectly good detector seem faulty. Before replacing parts, confirm the issue is low daytime energy rather than a failed component.
Start with a quick clean. Gently wipe the solar panel surface with a soft cloth and mild soap to remove pollen and dust. Clean solar surfaces every few months and retest after a full sunny day to judge results.
Run a placement audit. Check for shade from trees, shrubs, fences, or rooflines that shift across the day and season. Most units need about 6–8 hours of direct sunlight for reliable nightly performance.
Orientation and tilt for U.S. homes
When possible, face panels south in the Northern Hemisphere to maximize exposure. Increase tilt in winter to capture low-angle sun: winter tilt = latitude + 15°, summer tilt = latitude − 15°. A practical set-and-forget range is about 30°–50°.
Do not charge behind glass; window glass scatters and reflects light and cuts energy and efficiency sharply. After cleaning and repositioning, retest the unit after one full sunny day. If charging still fails, consult a repair guide like why panels stop charging, or review the safety disclaimer.

Repair or Replace Parts When Basic Fixes Don’t Work
If simple checks fail, decide whether a part swap or full replacement will save time and money.
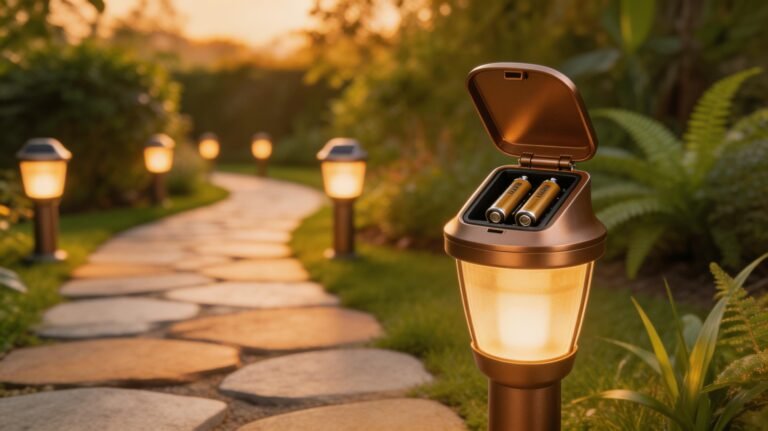
Replace rechargeable batteries first. Many NiMH rechargeable batteries last about 1–2 years. Open the compartment, match the size (AA or AAA), and install reputable replacements under $10. Fully charge the unit and retest over one night to judge performance.
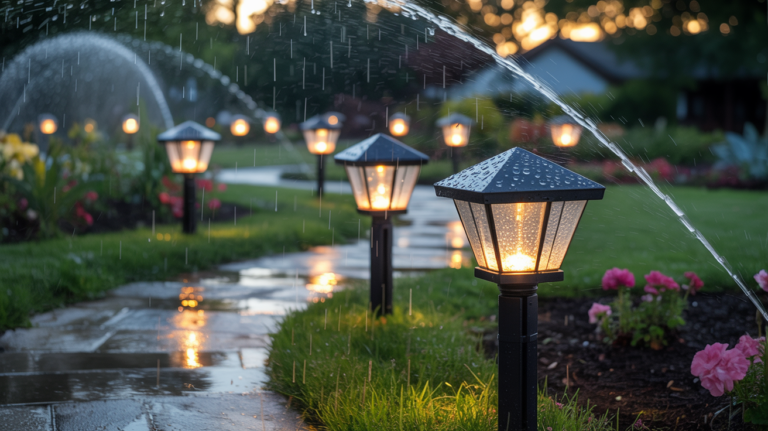
Inspect for water damage. Weather-resistant housings can still admit moisture. Look for condensation, rust on contacts, or green/white corrosion on terminals. Remove batteries before any inspection.
Drying protocol: air-dry components thoroughly, leave the housing open until all moisture is gone, then reinstall batteries only when completely dry.
When the light detector likely failed
If the lamp never reacts to darkness—even when covered—and batteries plus charging are confirmed good, the detector is likely dead. Replacement is reasonable if the unit is newer and the board is accessible.
| Issue | How to Check | Repair Cost Estimate | When to Replace |
|---|---|---|---|
| Battery capacity loss | Short runtime after full charge | $5–$12 for AA/AAA NiMH | After 1–2 years or repeated short nights |
| Water ingress | Condensation, rust, corroded terminals | $0–$20 depending on parts | Corrosion on wiring or housing failure |
| Detector/board failure | No response in total darkness with good batteries | $10–$30; often not cost-effective | Older units or heavy corrosion |
| Loose connections | Wiring or terminal play | $0–$10 for connectors | Repair if under 2–3 years and dry |
Repair vs. replace decision points: repair if the unit is under 2–3 years old, the panel still charges, and there is no heavy corrosion. Replace if wiring or the board is damaged, water has corroded connections, or the fixture costs under $20 to replace.
When you finish, verify connections are tight, wiring is seated, and gaskets are intact. For a step-by-step chip or detector swap, see how to fix a solar light.

Conclusion
Conclusion
Begin with the easiest actions—move the unit, wipe the panel, cycle power, and test at night to see if the issue clears. Confirm the light reacts to darkness, remove nearby glare sources, and then check charging and batteries before assuming a failed part.
Tonight test: after adjustments, wait until night, verify the lamp turns on, and confirm it shuts off by day. This validates both the detector and the charging cycle.
For long-term performance, keep the panel clean, prevent standing water in the housing, and revisit placement seasonally as foliage and sun angle change. If problems persist, replace rechargeable batteries first, inspect for corrosion, then consider full replacement.
Need help? Contact our team via support and troubleshooting for guided next steps.